Google My Business Profile Management & Optimization Tutorial
Category
SEO
Posted on
Updated

Author
Daria Nikolaeva
SEO & AI Search

Table of Contents
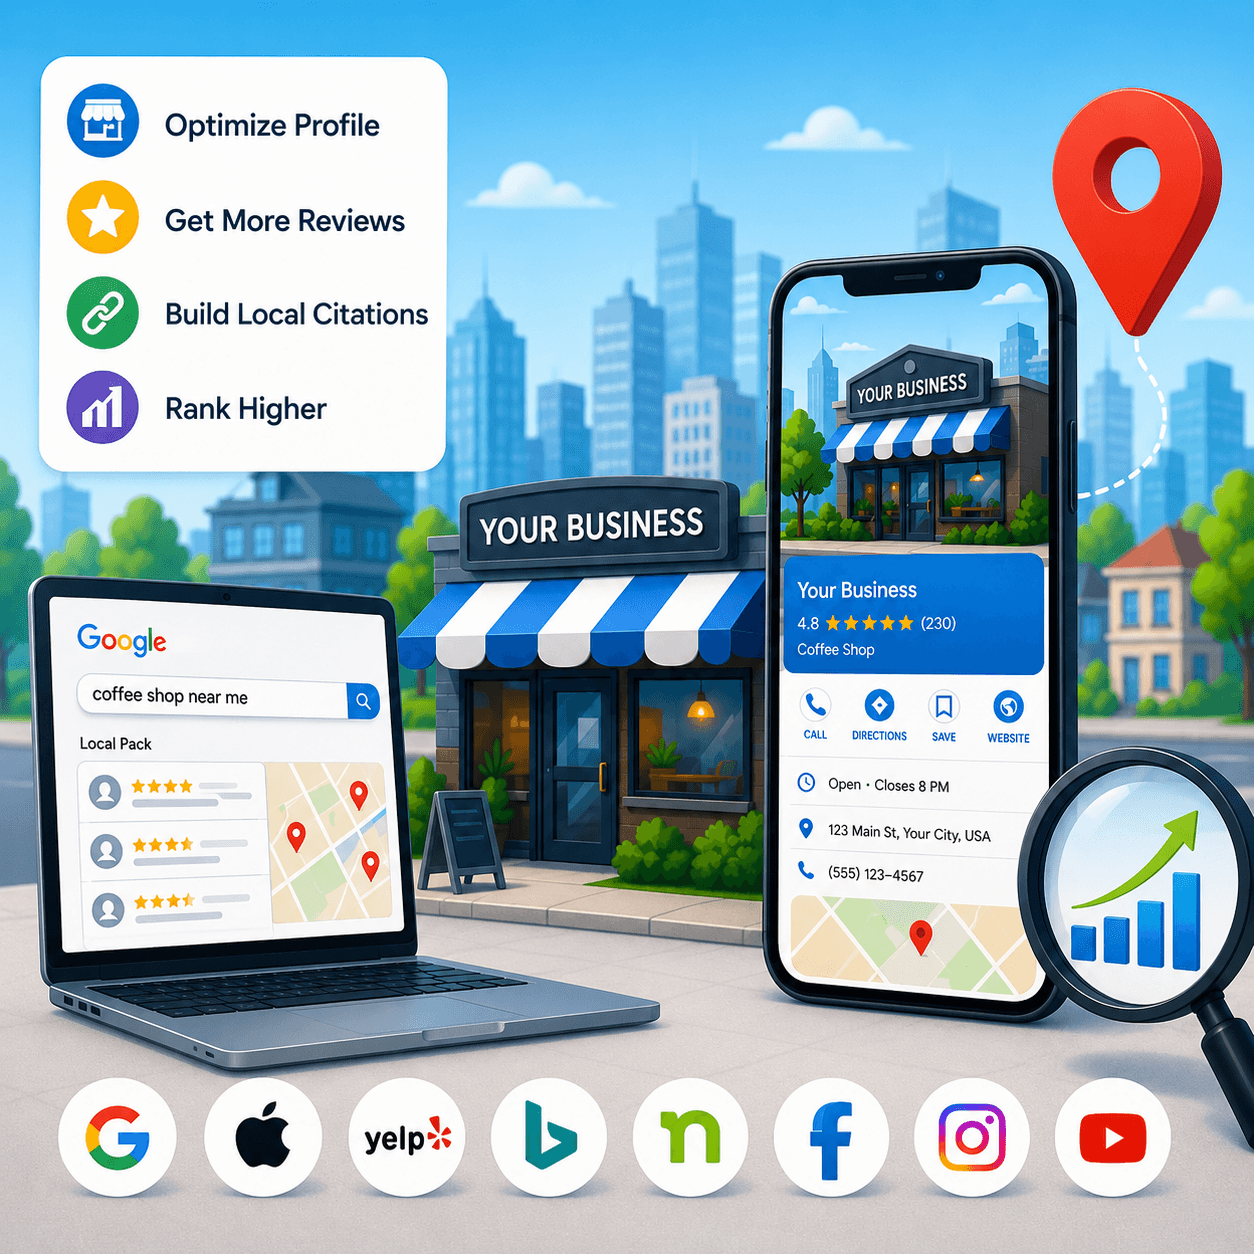
Managing and optimizing your Google My Business (GMB) profile is one of the most powerful ways to improve your local visibility, attract new customers, and build trust online. This step-by-step tutorial will guide you through the process of ensuring your profile is accurate, engaging, and fully optimized for search. If you haven't set up your profile yet, start with the GBP setup checklist first — then come back here for the full optimization walkthrough.
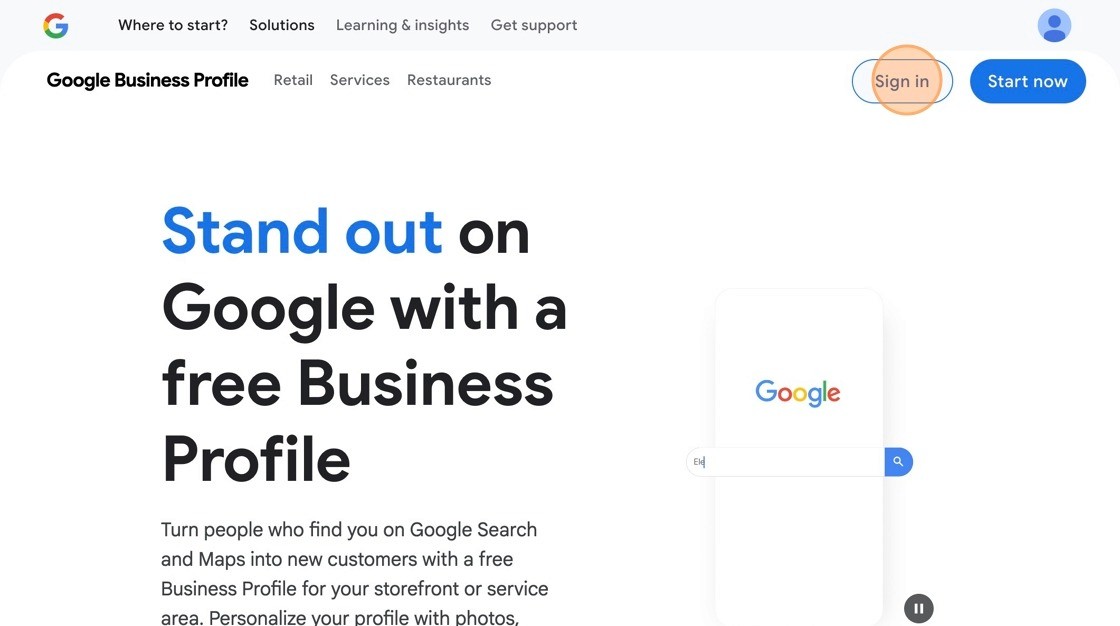
1. Navigate to https://business.google.com/us/business-profile/Click "Sign in"
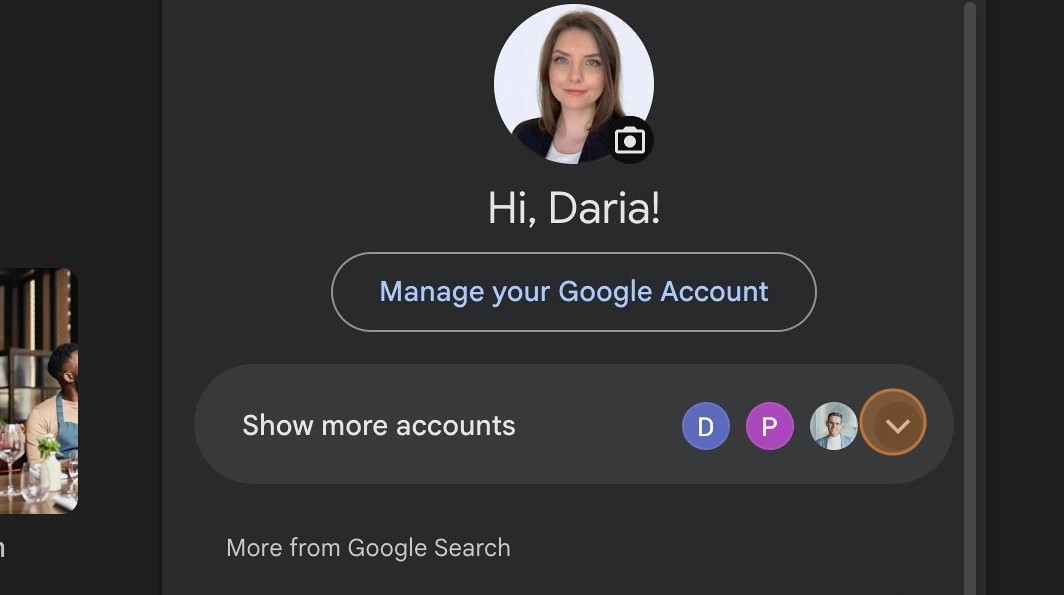
2. Confirm You’re Logged Into the Correct Account
Click your Gmail icon (your profile picture) on the upper right corner of the screen to make sure you are logged into the correct Google account that is associated with your Google Business Profile.
Pro Tip: Many people manage multiple Gmail accounts (personal, business, etc.). Double-checking this step ensures you don’t accidentally edit or claim the wrong business listing.
Switch to the Correct Gmail Account (If Needed)
If you notice you’re logged into the wrong Gmail account, click the down arrow next to your profile picture in the upper-right corner. A drop-down menu will appear showing all accounts currently signed in. Select the correct account associated with your Google Business Profile.
If the right account isn’t listed, click “Add another account” and sign in using the email address connected to your business profile.
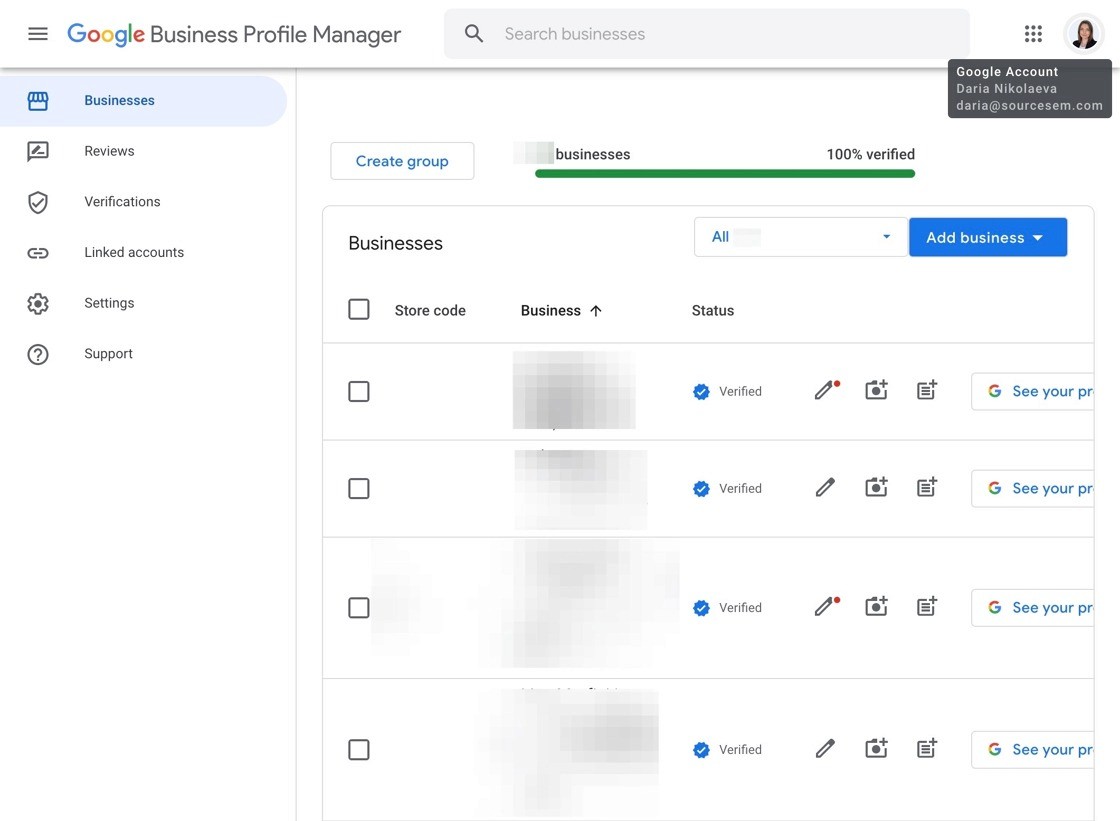
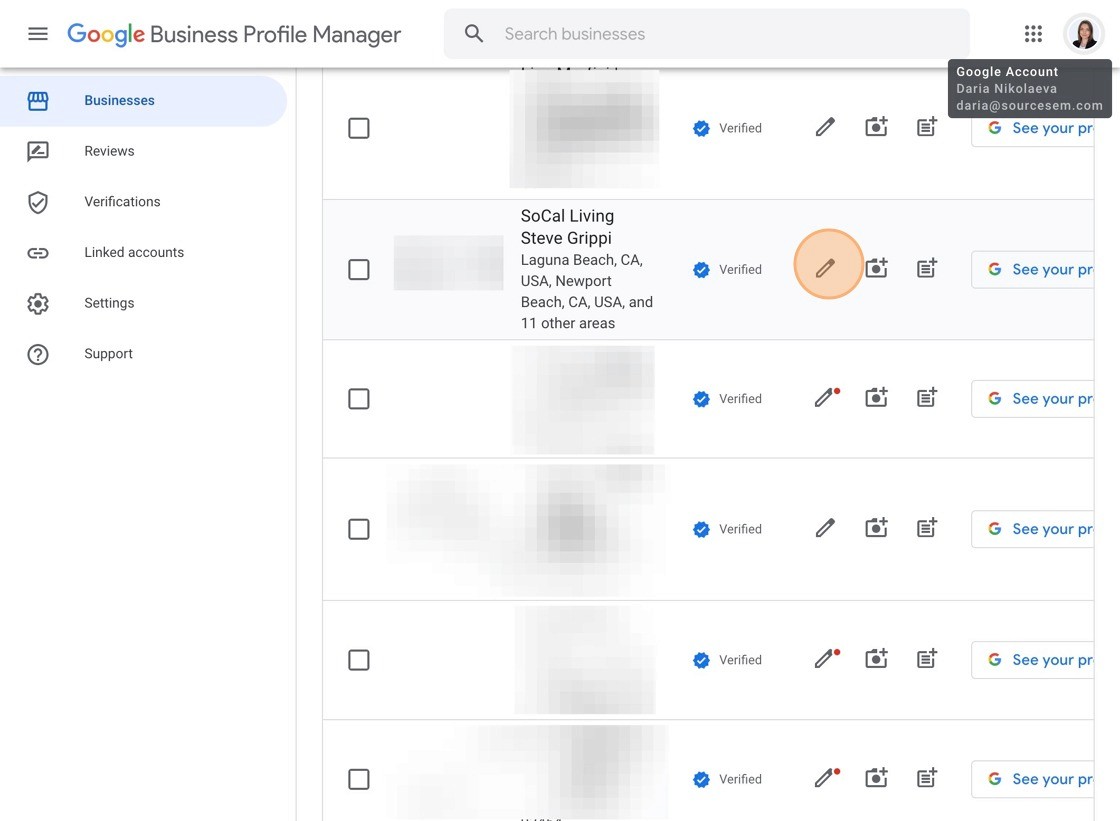
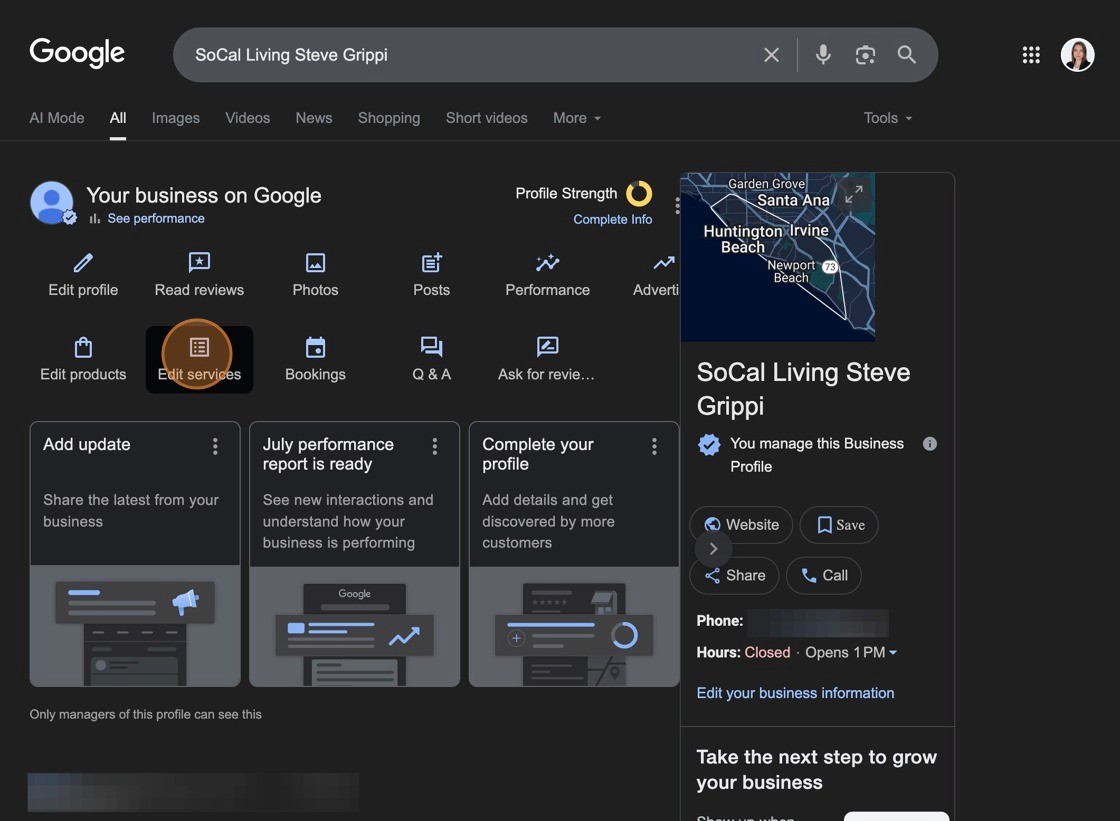
3. Open Google Business Profile Manager
Click the provided link to open Google Business Profile Manager. This is your main dashboard for managing all your business locations.
On this page, you’ll see:
A list of your businesses with their names, addresses, and statuses (e.g., Verified).
A navigation menu on the left with options such as Reviews, Verifications, Linked accounts, Settings, and Support.
A progress bar at the top showing how many businesses you manage and their verification status.
The “Add business” button, which allows you to add new locations if needed.
✅ Pro Tip: If you manage multiple locations, use the search bar at the top to quickly find the right business. This saves time and prevents accidental edits to the wrong listing.
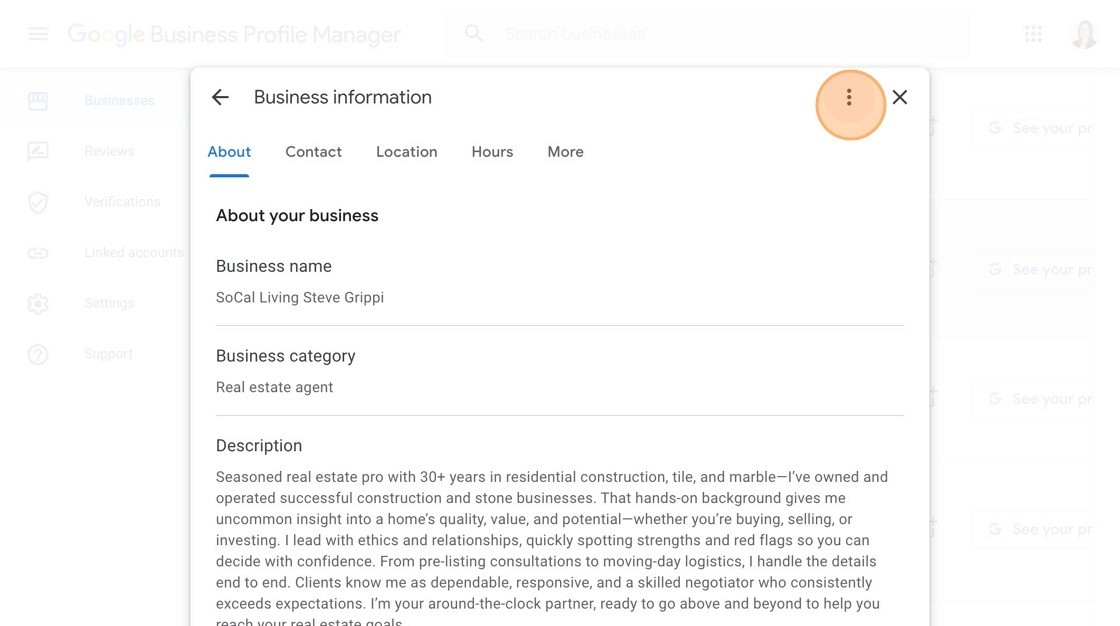
Edit Basic Google Business Profile Information
When you click on the pencil icon, you can edit the business details, such as
Business name (e.g., your official company or brand name)
Business category (choose the most accurate category, such as Real Estate Agent, Restaurant, or Salon)
Business description (a short summary about your services, experience, and what makes your business unique)
5. These fields are critical because they shape how your business appears on Google Search and Maps.
✅ Pro Tip: Keep your description concise, keyword-rich, and customer-focused. Instead of stuffing keywords, write naturally about what you offer and what sets you apart—Google uses this to better match your profile with customer searches.
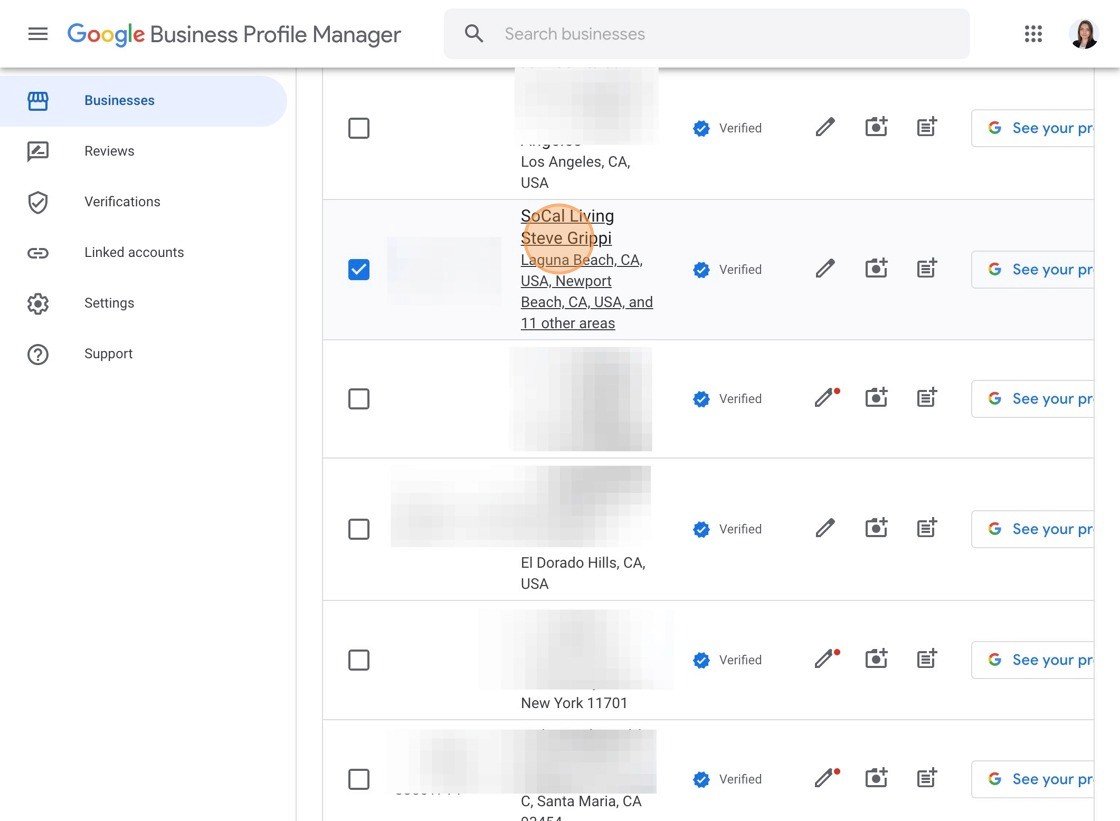
6. View Your Profile on Google Search
To see how your business appears on Google Search and Maps, click either:
The “See your profile” button, or
Your business profile name directly.
This will open the live version of your Google Business Profile, where you can review how customers see your information, photos, and updates.
✅ Pro Tip: Check your profile from both desktop and mobile devices—Google may display information differently depending on the platform, and most customers will likely find you on their phones.
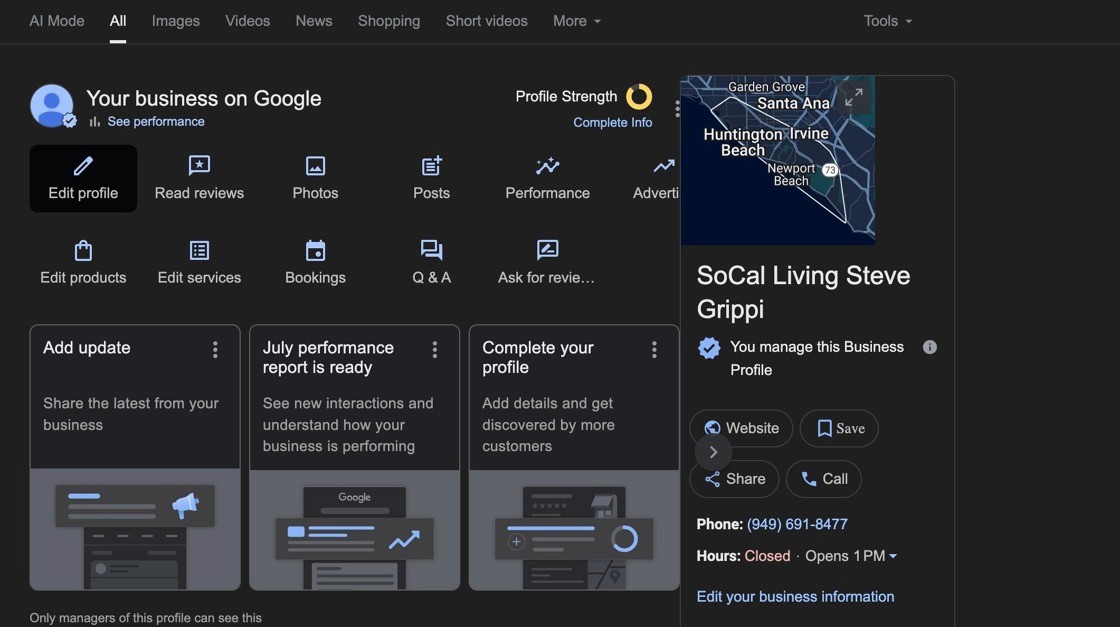
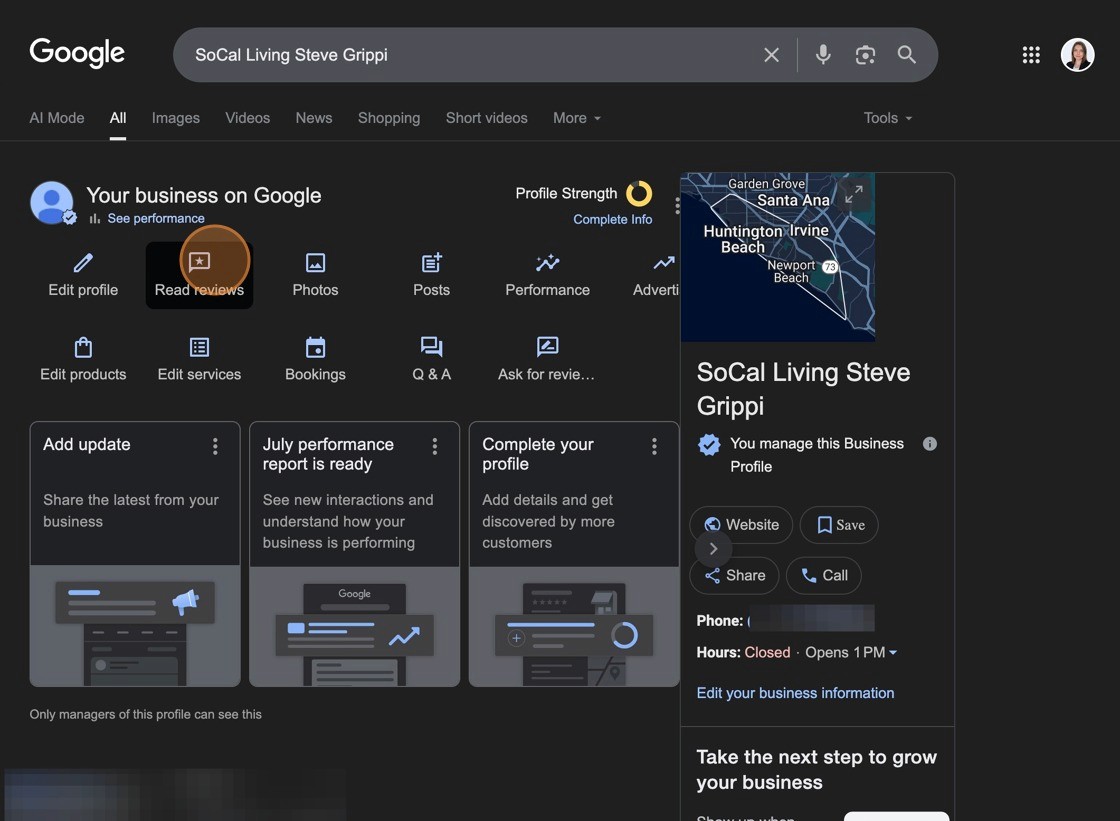
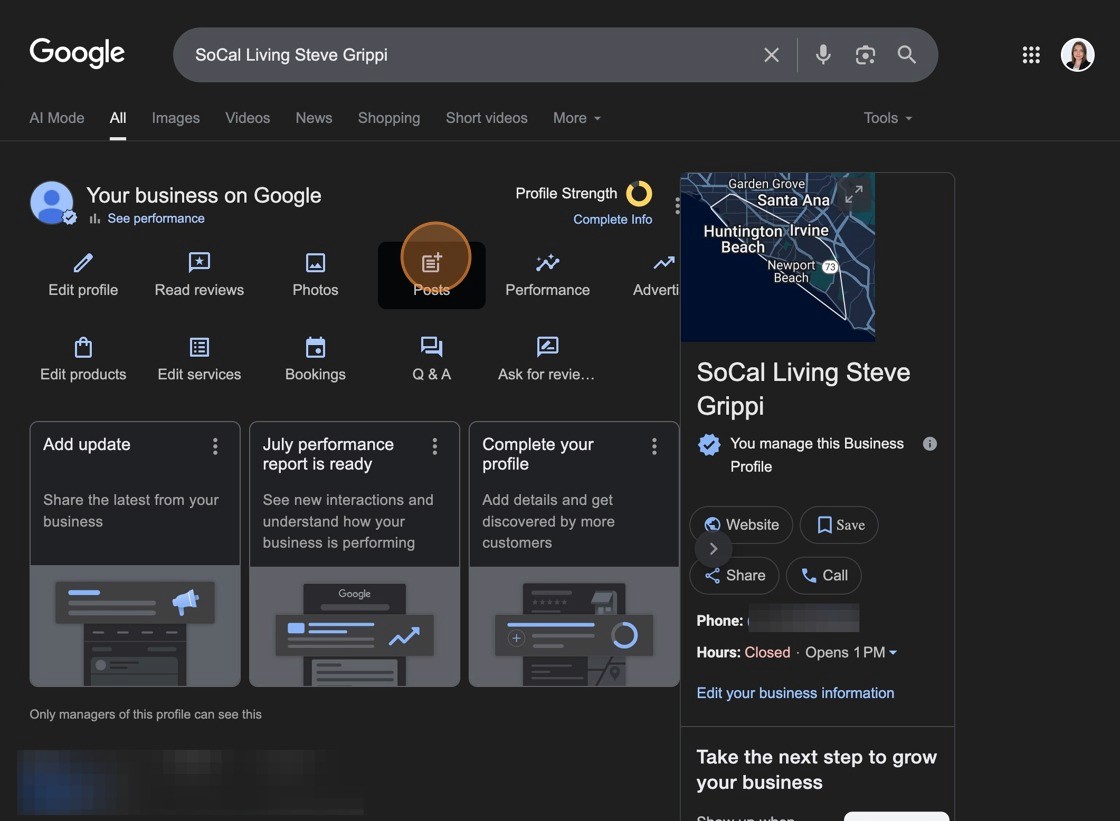
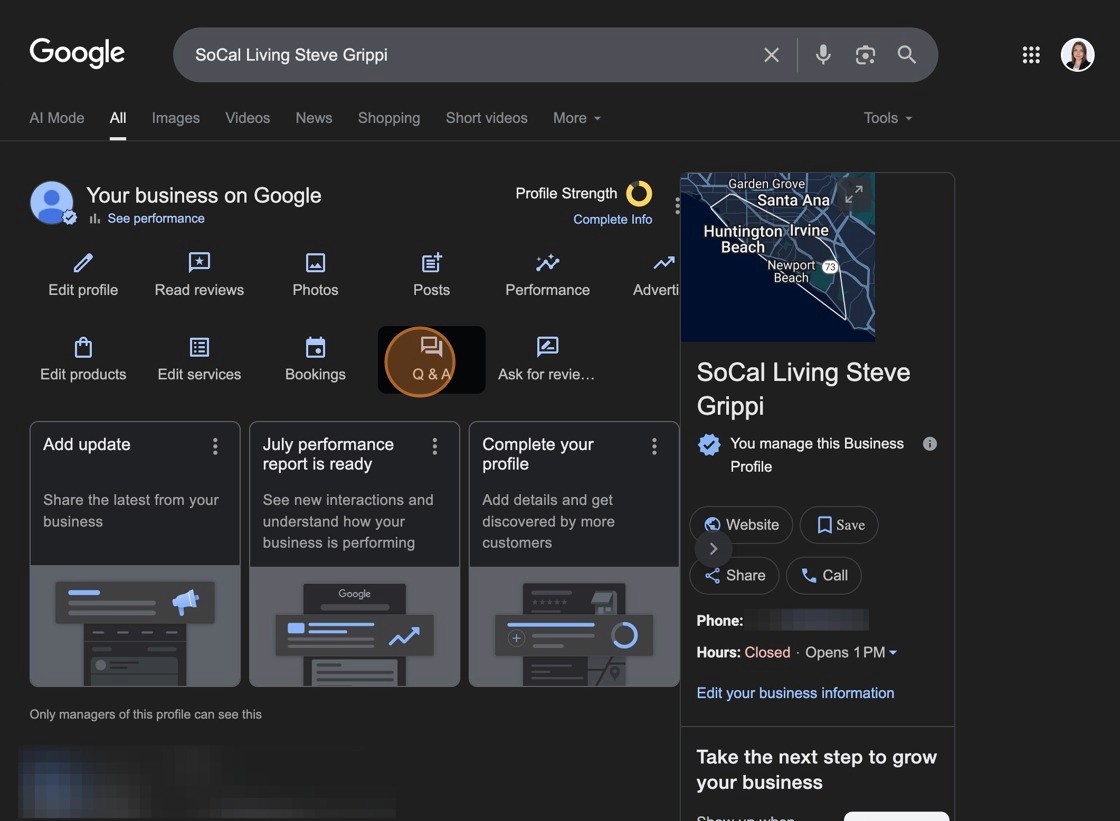
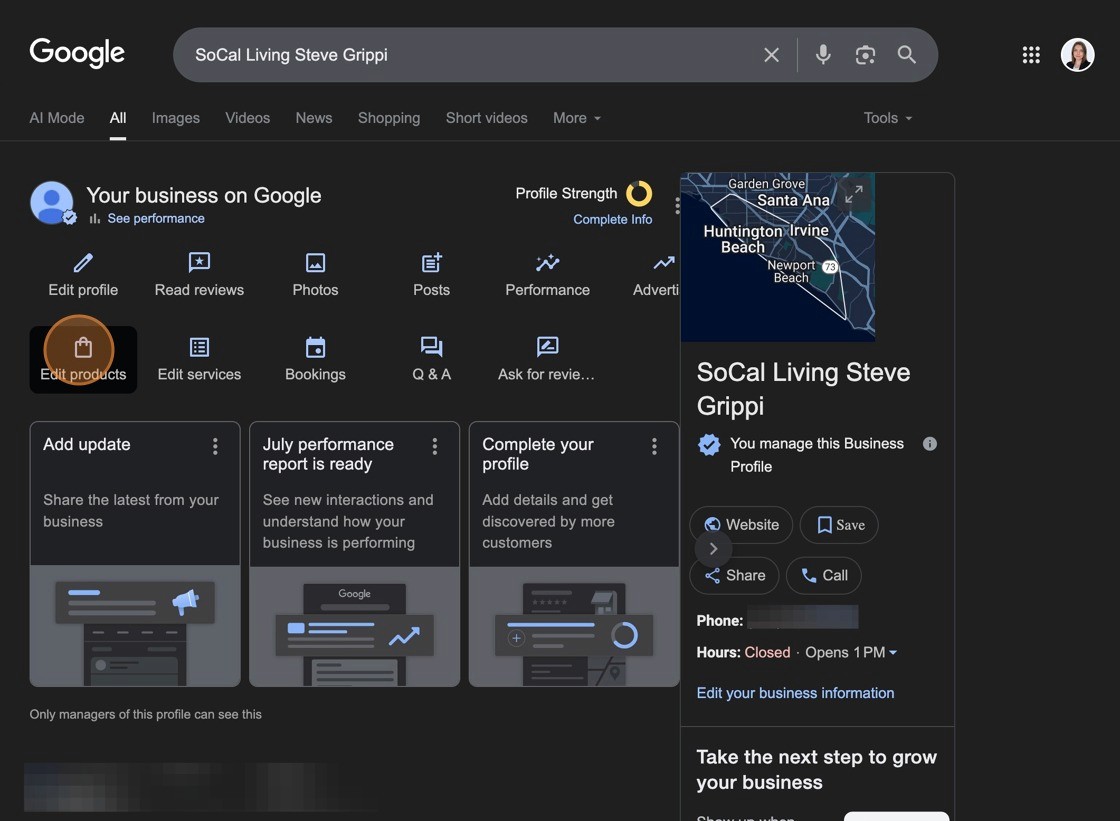
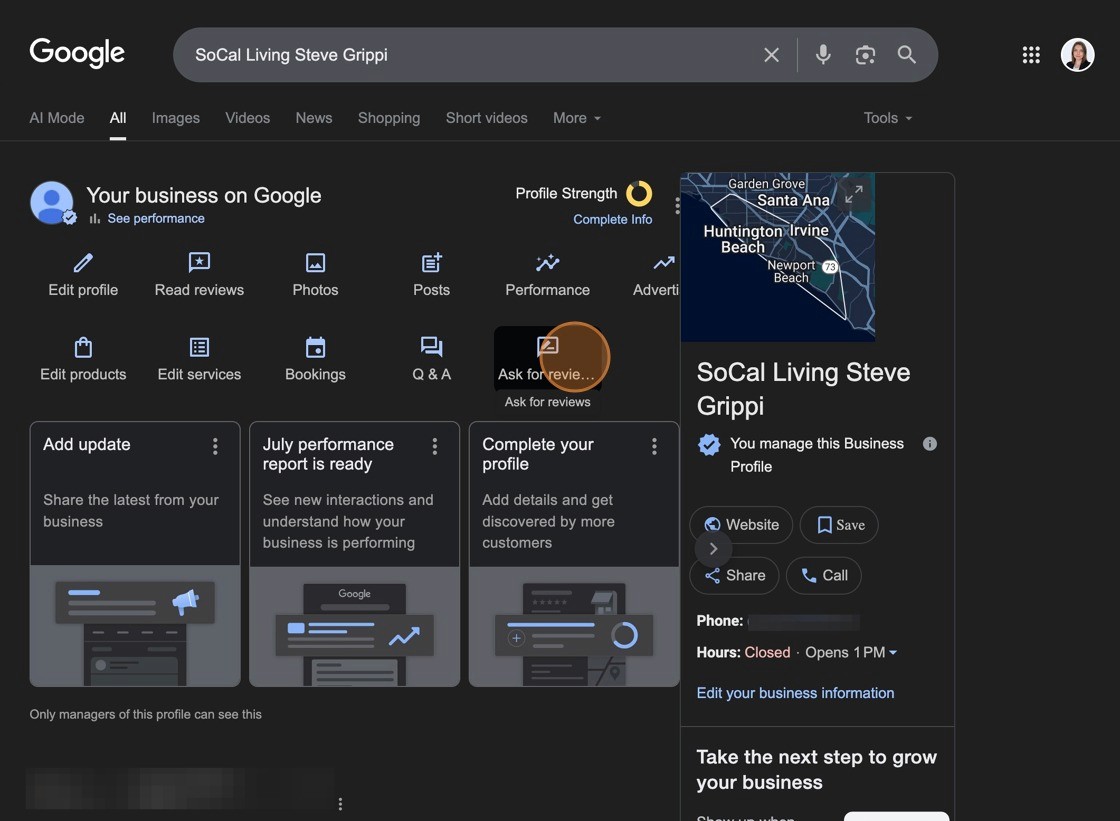
7. Access the Google Business Profile Dashboard
Once click on the "See your profile" button, you’ll see the Google Business Profile dashboard appear at the top of search results.
This dashboard includes quick-access tools such as:
Edit profile – update core business information
Read reviews – view and respond to customer reviews
Photos – add or manage images and videos
Posts – share updates, offers, or events
Performance – check profile insights and analytics
Edit products & services – showcase what your business offers
Bookings & Q&A – manage customer interactions directly
✅ Pro Tip: Think of this dashboard as your business “command center.” Use it regularly to update details, respond to reviews, and track performance. Frequent activity not only helps your profile look fresh but can also improve your local search ranking.
✅ Pro Tip: Google often prioritizes businesses that keep their profiles fresh. Make it a habit to review and update your profile at least once a month—this signals to Google (and customers) that your business is active and reliable.
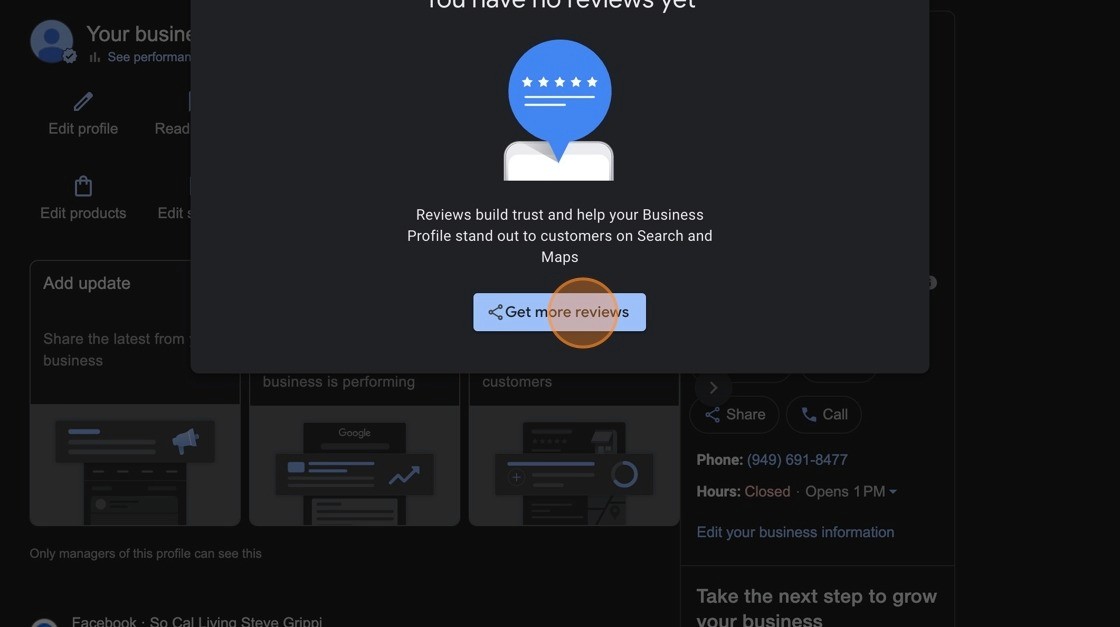
8. Manage Customer Reviews
Click on “Read reviews” from your Google Business Profile dashboard to view all customer reviews left on your profile. From here, you can:
Read customer feedback
Respond directly to both positive and negative reviews
Report inappropriate or spam reviews
✅ Pro Tip: Respond to every review—good or bad. Thanking happy customers builds loyalty, while addressing negative feedback professionally shows potential customers that you care and are proactive about solving problems.
9. Click "Get more reviews" to copy and share your unique review link to encourage more customers to leave feedback
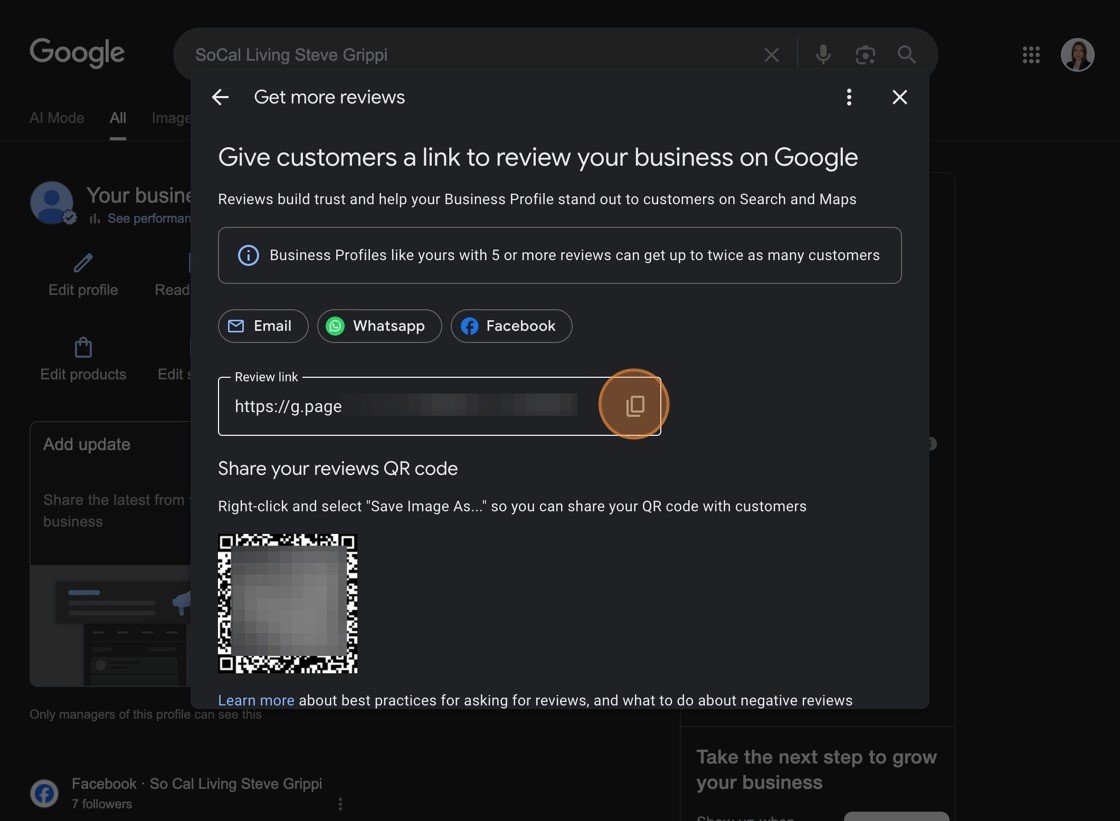
10. Share Your Google Business Profile Review Link
When you click “Get More Reviews”, a pop-up window appears with tools to help you collect customer reviews for your Google Business Profile.
In this window, you can:
Copy your unique review link – share it directly with customers so they can leave reviews quickly.
Share via Email, WhatsApp, or Facebook – built-in buttons make it easy to send the link through popular channels.
Download and share a QR code – customers can scan it with their phone to go straight to your review page.
Encourage more reviews – the window reminds you that profiles with more reviews attract significantly more customers.
✅ Pro Tip: Print your review QR code on business cards, receipts, or flyers. This makes it easy for in-person customers to leave a review on the spot, boosting your credibility and local ranking.
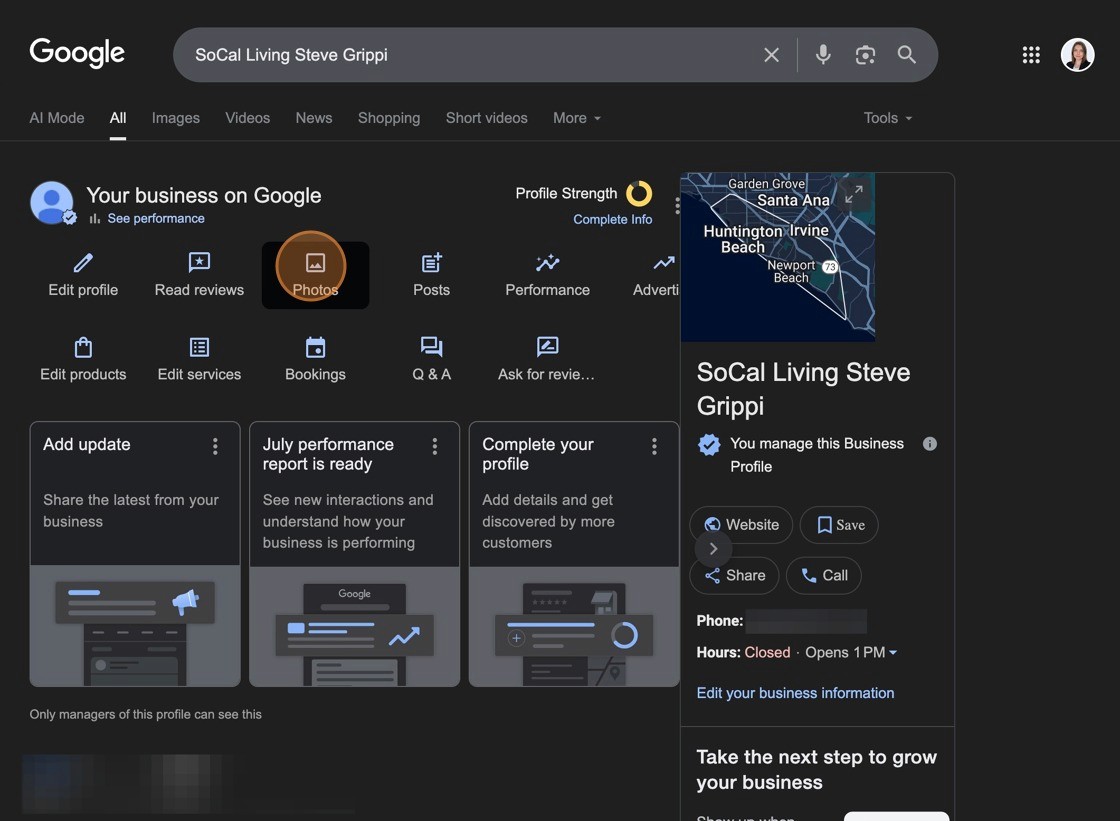
11. Add and Manage Photos
Click on the “Photos” button in your Google Business Profile dashboard to upload and manage images for your business.
From here, you can:
Upload interior and exterior photos of your location
Add team photos to build trust and showcase your staff
Share product or service photos to highlight what you offer
Upload logos and cover photos to strengthen your brand identity
✅ Pro Tip: Businesses with high-quality, updated photos get significantly more clicks and calls. Use real, well-lit images rather than stock photos—customers engage more with authentic visuals.
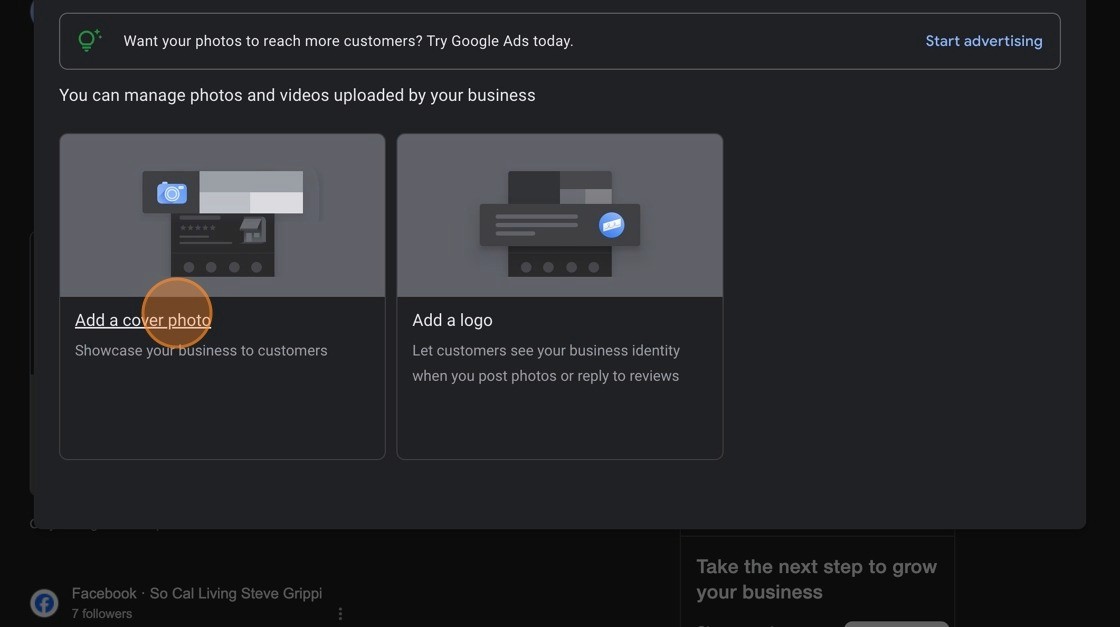
12. Add a Cover Photo
Click “Add a cover photo” to upload the main image that represents your business. This is the first photo customers will often see when they find your profile on Google Search or Maps.
You will then be prompted to select an image by either:
Dragging and dropping a photo into the upload box, or
Clicking the upload area to browse and select an image from your computer.
✅ Pro Tip: Choose a high-quality, horizontal image (at least 720px wide) that best represents your business. For example, use a bright photo of your storefront, interior, or signature product/service. This sets the tone for your profile and attracts more clicks.
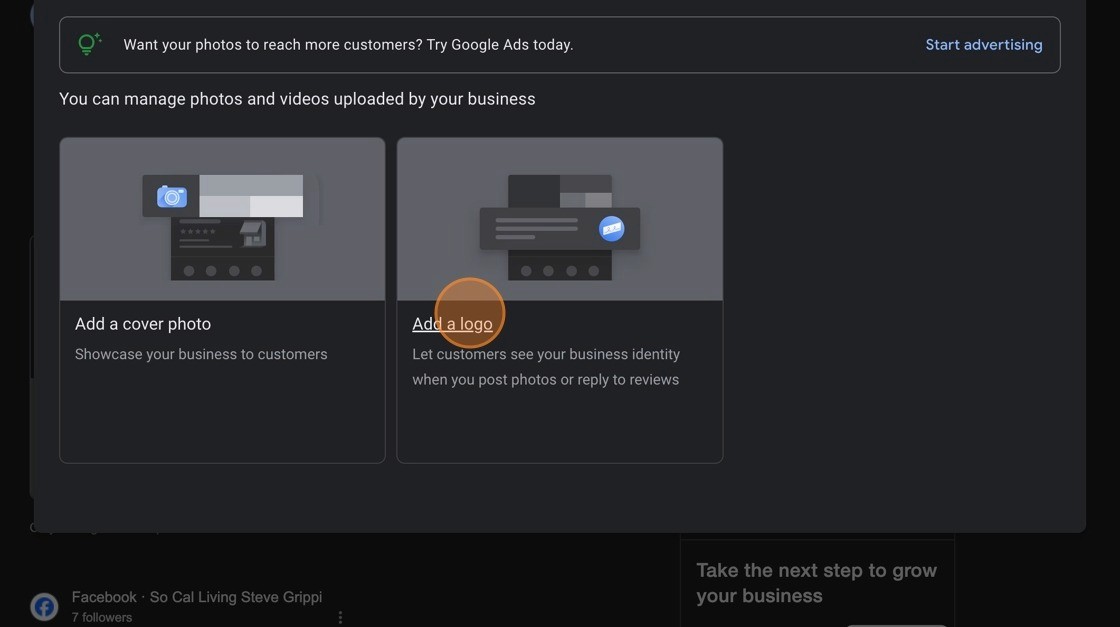
13. Add Your Logo to GBP
Click “Add a logo” to upload your business logo. This helps customers instantly recognize your brand when they see your profile, posts, or review responses.
You can upload your logo by:
Dragging and dropping the image file into the upload box, or
Clicking “Select image” to browse and upload from your computer.
✅ Pro Tip: Use a square image (at least 720 × 720 pixels) in PNG or JPEG format. If possible, upload a version of your logo with a transparent background for a cleaner look across Google surfaces.
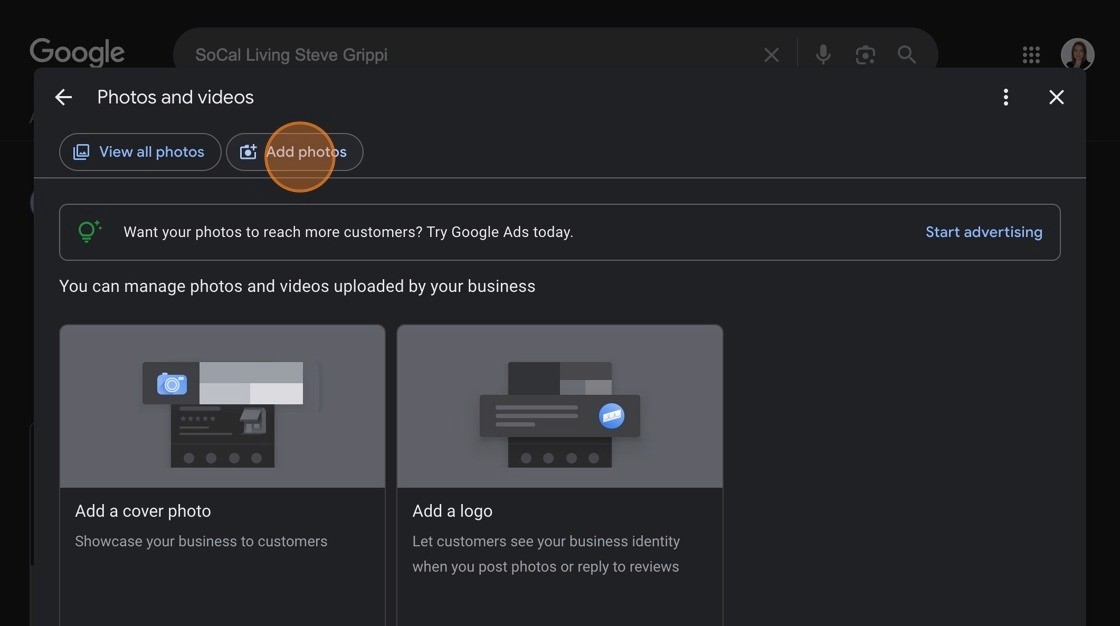
14. Add Photos
Click the “Add photos” button in the Photos and Videos section to upload new images to your Google Business Profile. This is where you can showcase your business with fresh visuals that customers will see when they search for you.
✅ Pro Tip: Upload photos regularly (at least once per month). Google favors active profiles, and fresh content signals to potential customers that your business is thriving.
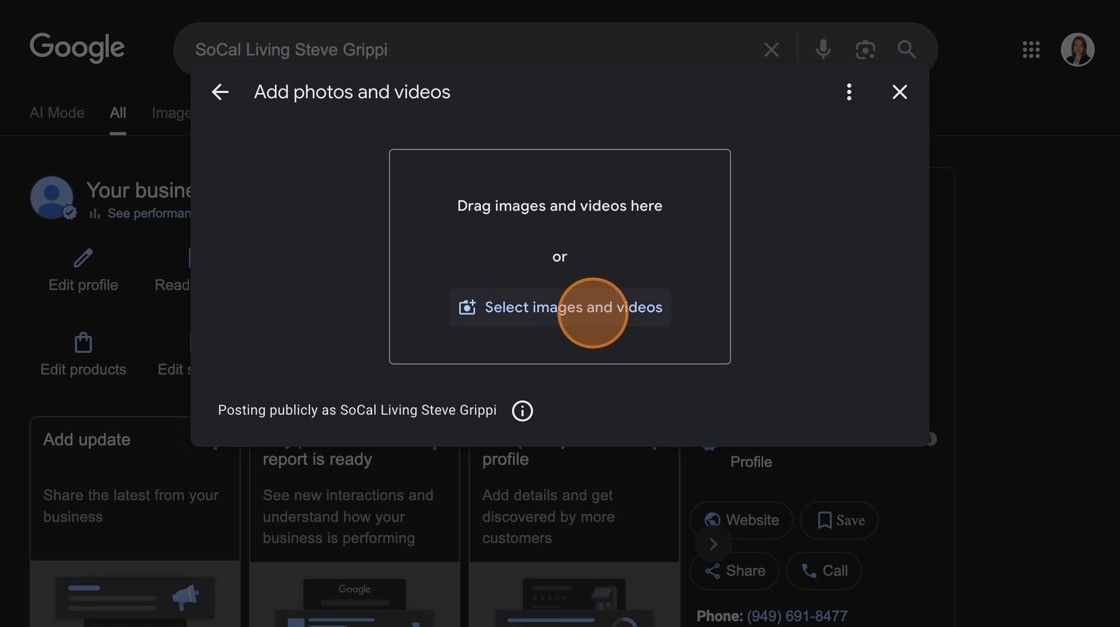
15. Add Photos and Videos
After clicking “Add photos”, you’ll see an upload window. Here, you can:
Drag and drop images or videos directly into the upload box, or
Click “Select images and videos” to browse files from your computer.
✅ Pro Tip: Use high-resolution photos (at least 720px wide) and short, clear videos (30–60 seconds). Visuals of your team, products, or services create trust and drive higher engagement.
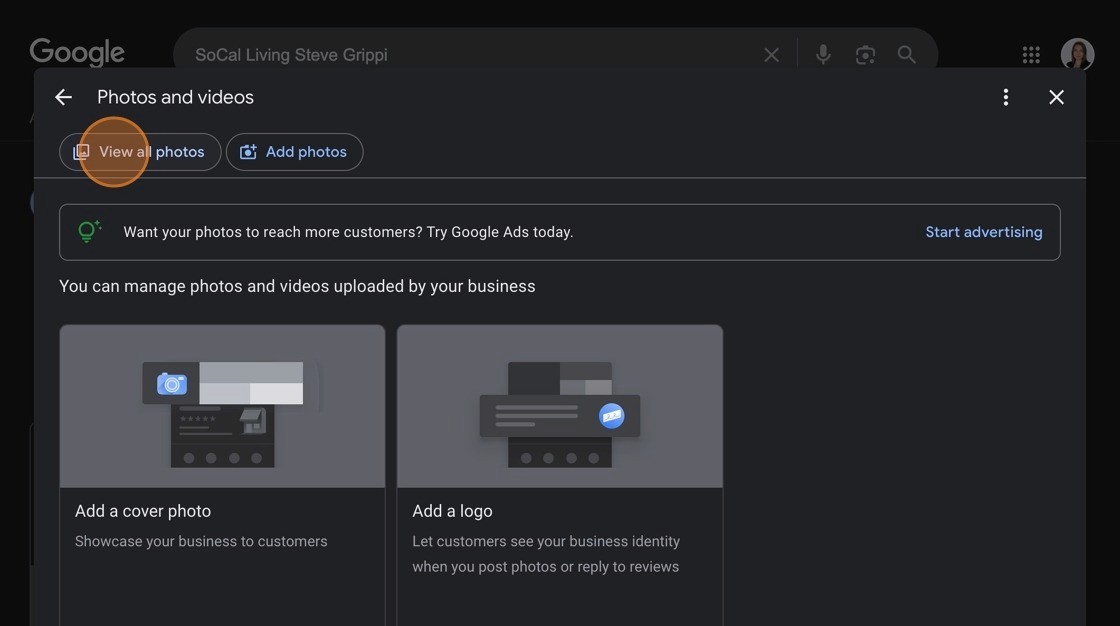
16. Click "View all photos" to View ALL Business Profile Images
This option lets you see all the images and videos you’ve uploaded to your Business Profile.
You can browse, update, or remove existing photos here.
Helpful for managing your visual content and keeping your profile fresh.
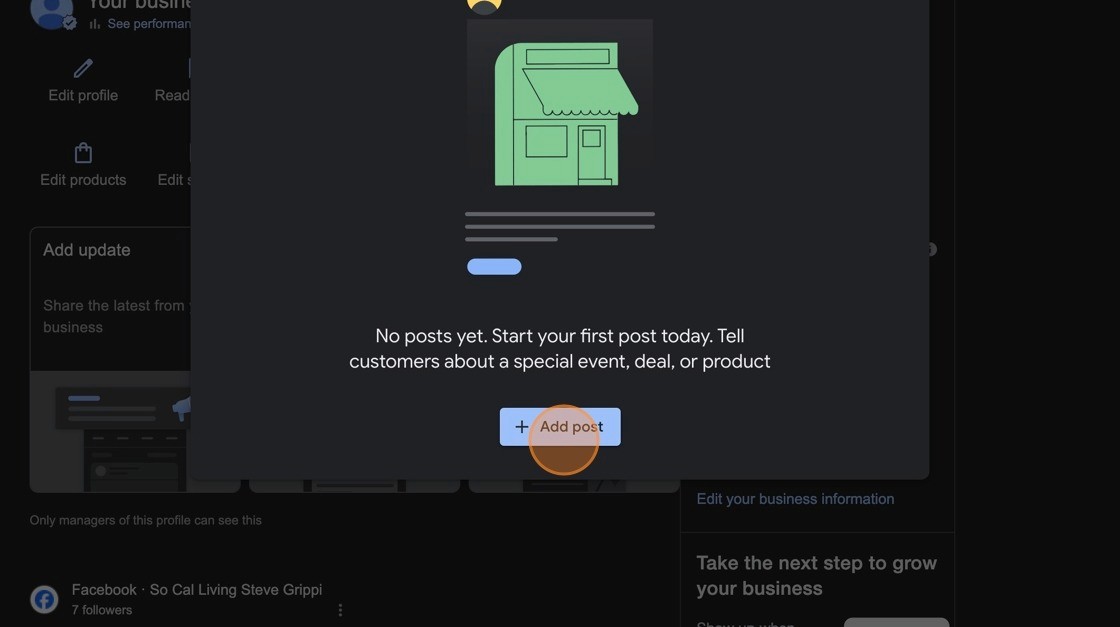
17. Create a Post to Share Updates, Promotions, and Events
From your Google Business Profile dashboard, click on the “Posts” button. This feature allows you to share updates, promotions, events, or news directly on your business profile, which customers will see on Google Search and Maps.
If you're not sure what to write, we've put together 15 ready-to-use GBP post templates you can copy and adapt for your business.
✅ Pro Tip: Posts are a great way to highlight seasonal offers, limited-time promotions, or important updates. Keep your posts short, engaging, and always include a call-to-action (like “Call now,” “Learn more,” or “Shop today”).
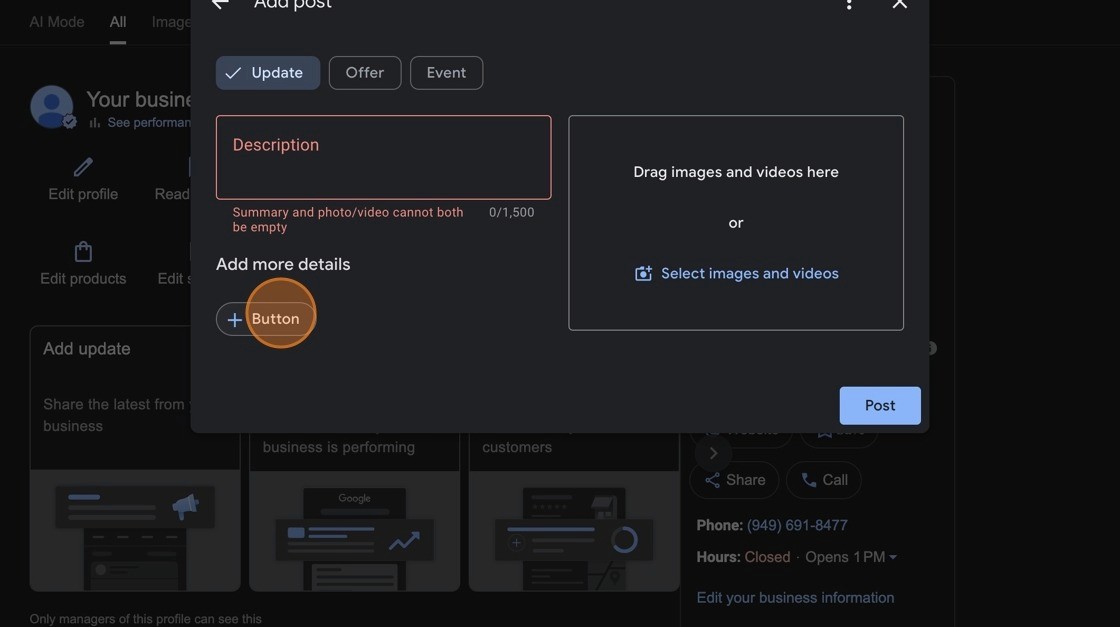
18. Add a New Post
After clicking into the Posts section, click “+ Add post” to create your first update. You’ll be able to add:
Text (e.g., promotion details, event info, or an announcement)
Photos or videos to make the post more eye-catching
A button (e.g., “Book,” “Order Online,” “Call Now”) to drive customer action
✅ Pro Tip: Post consistently (weekly or bi-weekly). Google treats regular updates as a sign of an active business, and customers are more likely to engage when they see fresh content.
19. Click "Add update", "Offer" or "Event"
This option allows you to share the latest news from your business (special events, promotions, or updates customers should know about).
✅ Examples:
Add Update: "We’ve extended our business hours! Now open until 9 PM on weekdays to better serve you."
Add Offer: "Summer Special: Get 20% off all services through August 31. Don’t miss out — book today!"
Add Event: "Join us for our Grand Reopening on September 10th! Free refreshments, giveaways, and exclusive discounts all day."
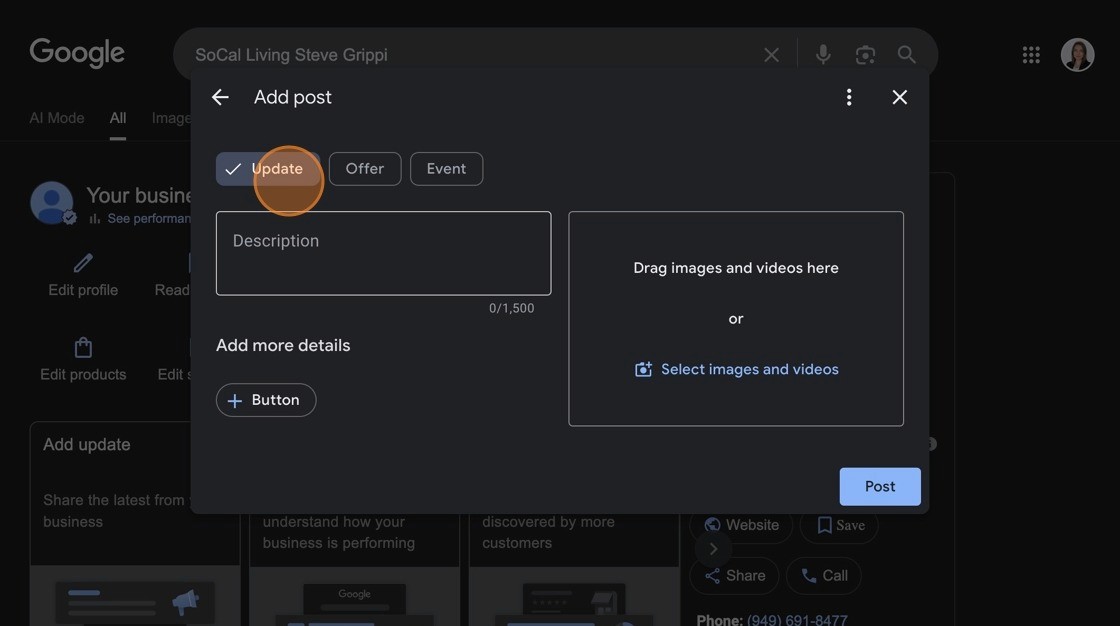
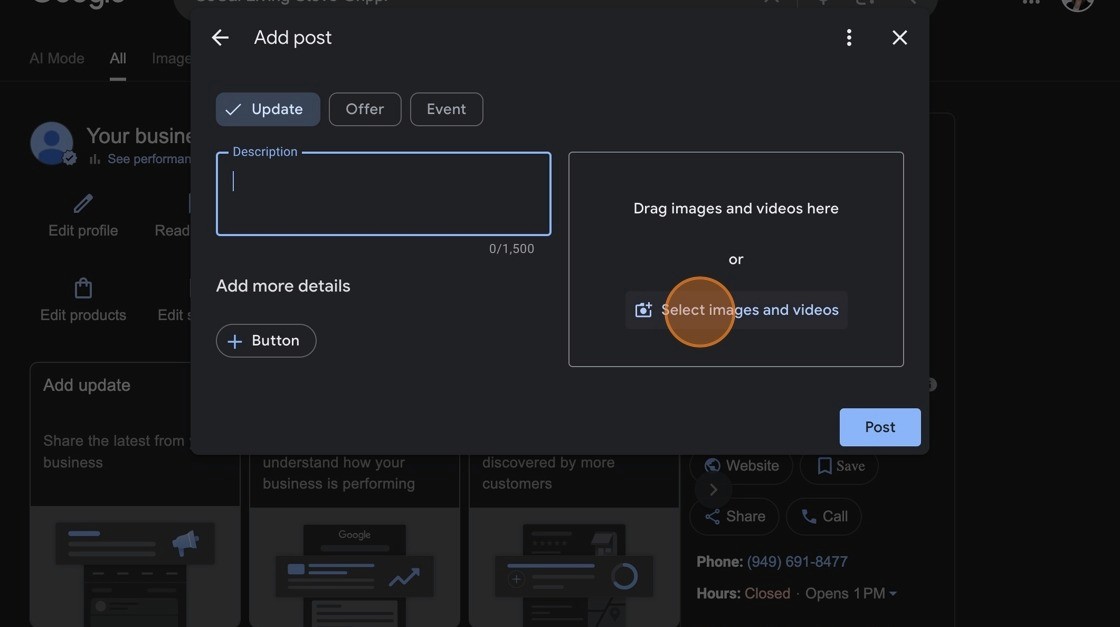
Click the "Description" field to Update Your GBP Description
In this step, you’ll enter the main content for your post. This is where you describe your update, offer, or event in detail so customers know exactly what’s happening. You can write up to 1,500 characters, but keeping it concise and engaging is best.
✅ Pro Tip: Use the first sentence as a hook — it’s what shows up in previews. Highlight the most important detail right away (e.g., “✨ 20% off all services this week only!”). Then, add supporting details like dates, benefits, or instructions.
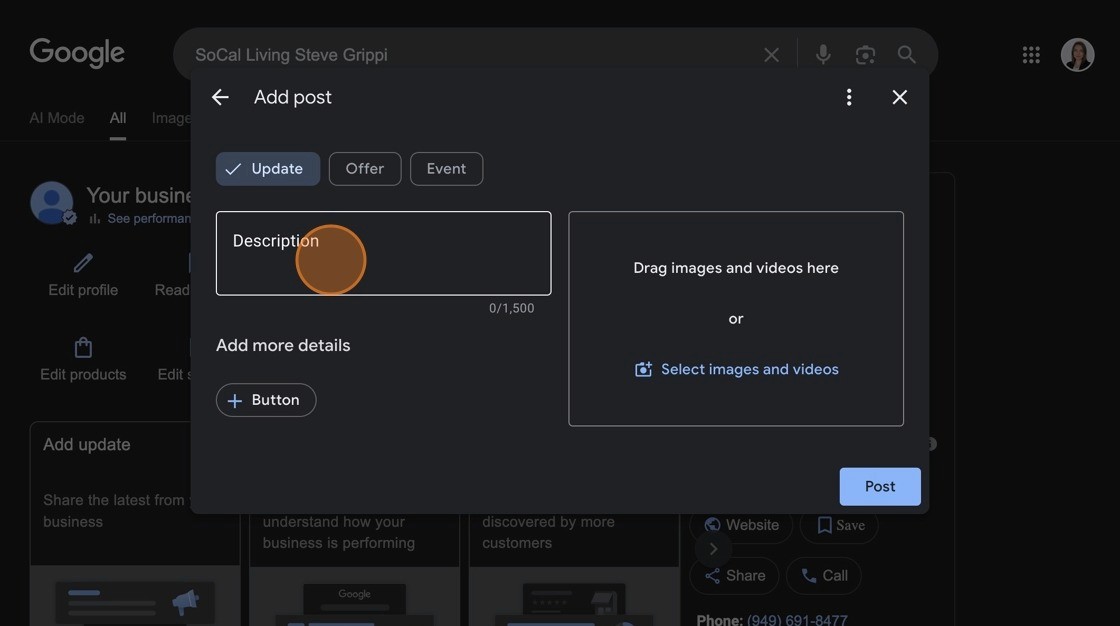
21. Click "Select images and videos" to add images or Videos to your Post
In this step, you’ll choose a photo or video to include in your post. Visual content makes your update, offer, or event stand out in search results and can increase customer engagement significantly.
✅ Pro Tip: Always use high-quality, well-lit images or short videos that clearly represent your product, service, or event. Avoid stock photos if possible — real, authentic images of your business perform much better and build trust.
Image & Video Size Guidelines for Google Business Profile
Photo/Image Guidelines
Format: JPG or PNG
File Size: Between 10 KB and 5 MB
Recommended Resolution:
Square Images: 720 × 720 pixels (ideal for logos and general photos)
Post Images (Update/Offer/Event/Product): 1200 × 900 pixels (4:3 aspect ratio) is optimal. Smaller is acceptable—minimum around 400 × 300 pixels
Aspect Ratio: Keep it around 4:3 to avoid unwanted cropping
Video Guidelines
Duration: Up to 30 seconds
File Size: Up to 75 MB (some sources mention 100 MB, but 75 MB is most consistent)
Resolution: 720p or higher; landscape format (16:9) preferred
✅ Pro Tip: Use high-quality visuals to make your profile stand out. For best results:
Center your subject in the frame to avoid cropping.
Prioritize authentic photos and videos—genuine business visuals outperform generic stock images.
Keep image file sizes efficient to ensure fast loading and smooth display on mobile devices.
. Add CTA "Button" to your Post
In this step, you add a call-to-action (CTA) button to your post. The button lets customers quickly take action, such as visiting your website, calling your business, booking an appointment, or placing an order.
✅ Pro Tip: Choose a button that matches your goal.
If you want more website visits, use “Learn more” or “Visit website”.
For bookings, use “Book”.
For sales or offers, use “Order online” or “Buy”.
To drive direct engagement, use “Call now”.
A clear, action-oriented button increases customer clicks and conversions.
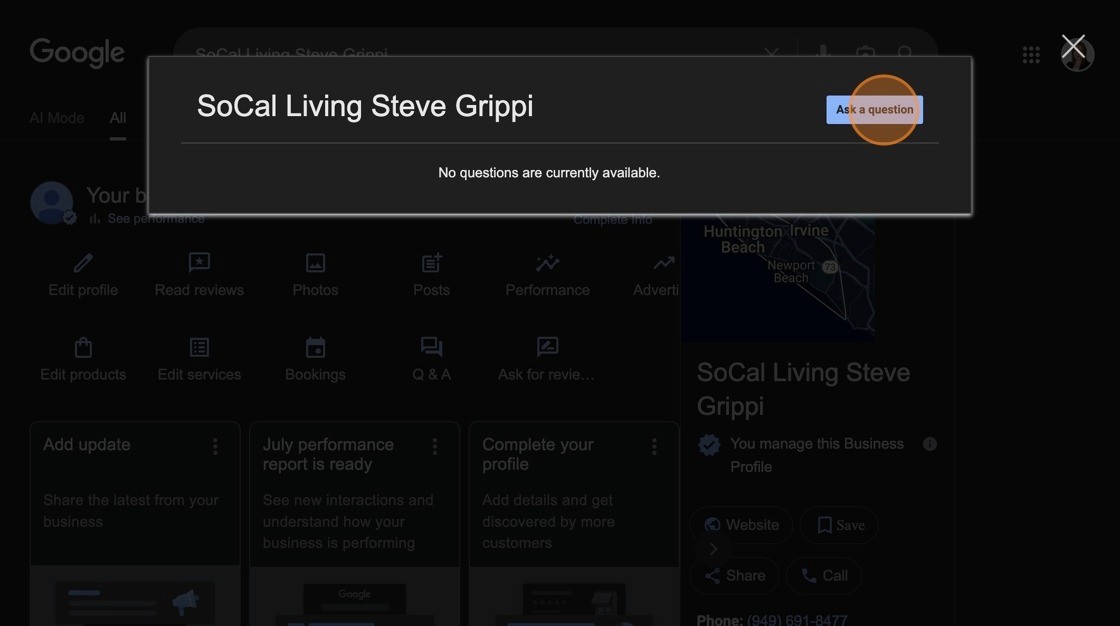
23. Click “Q&A” to proactively publish your FAQs to the business profile.
You can also answer your customers' questions from this section.
24. If no questions are available yet, you can proactively post common questions that customers might ask.
Example: “Do you offer free consultations?”
Click "Ask a question".
Type your question in the text box.
👉 Do not post the answer in the same window.
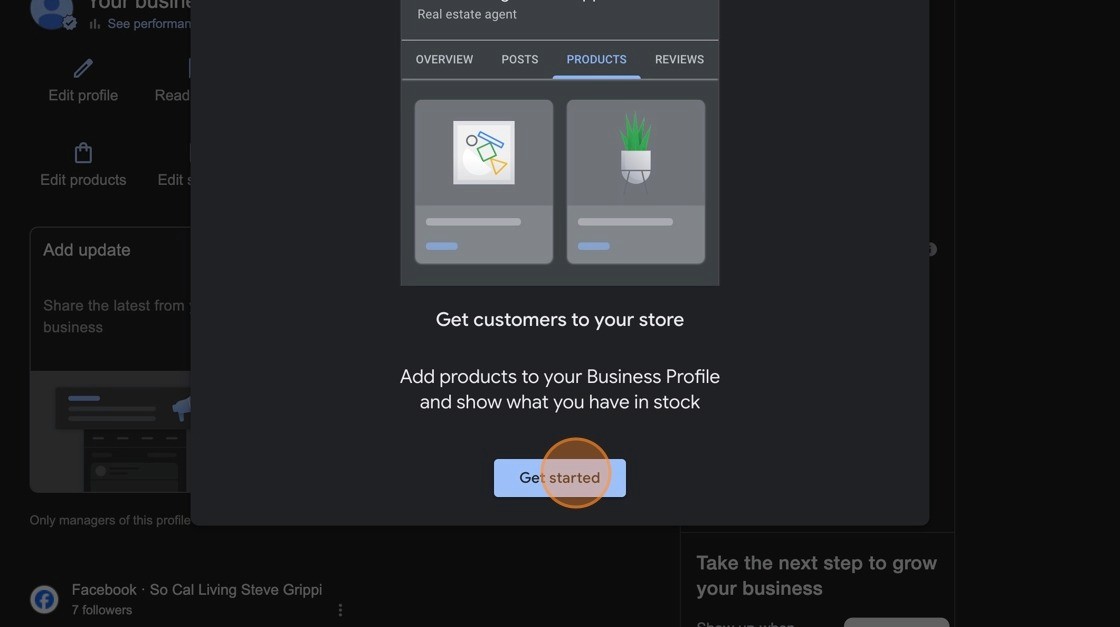
25. Manage the products shown on your Google Business Profile.
When you click the “Edit products” icon (shopping bag symbol), you can:
Add new products that you sell.
Upload product photos.
Enter details such as name, description, category, and price.
Organize your offerings so customers browsing your profile can quickly see what you provide.
👉 In short: This step lets you showcase and manage your products directly on Google Search and Maps, making it easier for potential customers to browse before contacting you.
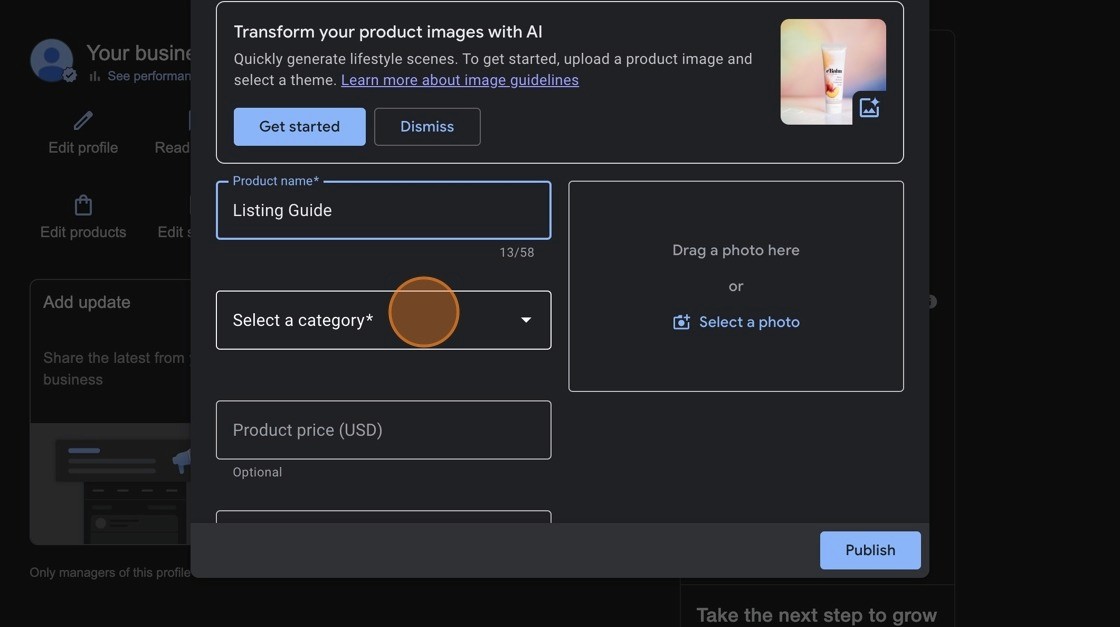
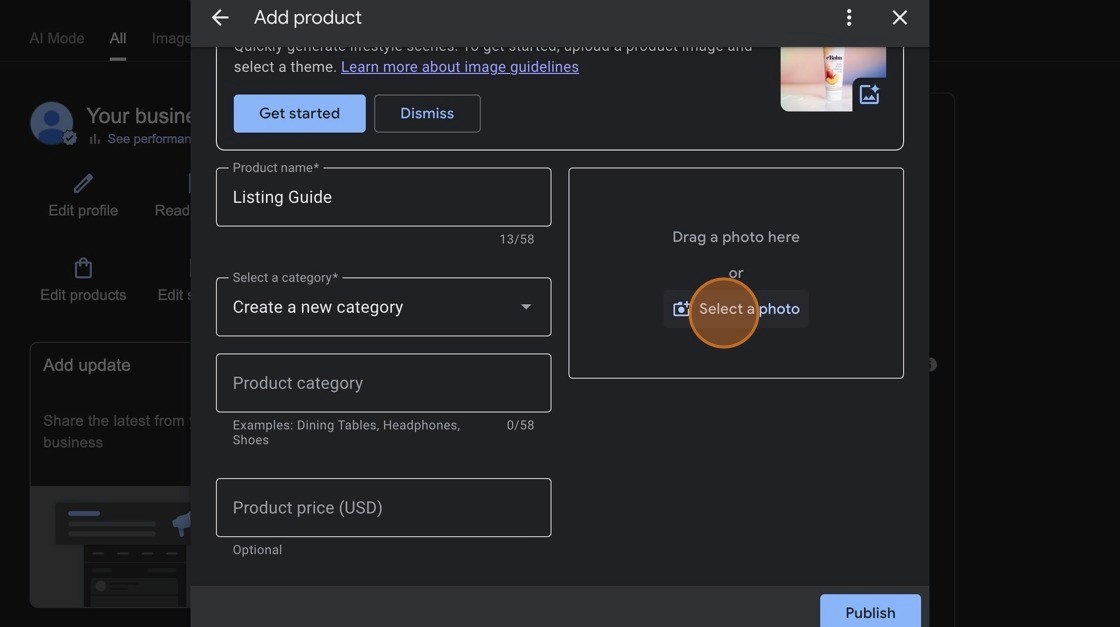
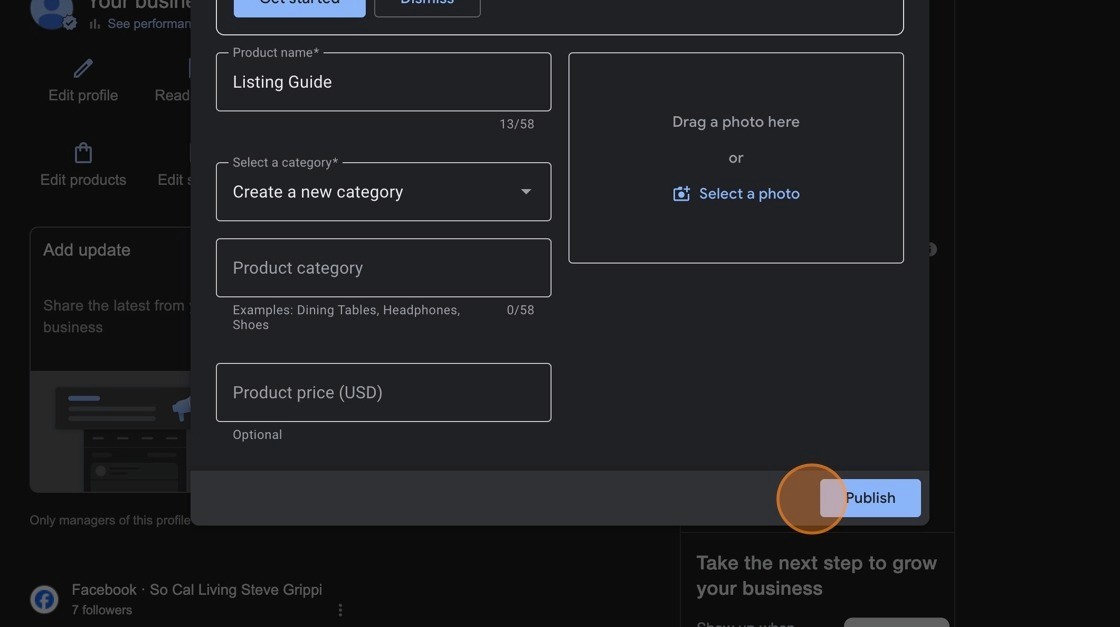
26. Click "Get started" to add a product
27. Click inside the “Product name” field and type the name of your product.
Choose a short, clear title that customers can quickly recognize. (Max 58 characters.)
✅ Pro Tip: Use names that describe the product and include keywords people might search for. For example:
Instead of “Model A123” → use “Stainless Steel Water Bottle – 20oz”
Instead of “Basic Service” → use “Home Cleaning Service – 2 Hours”
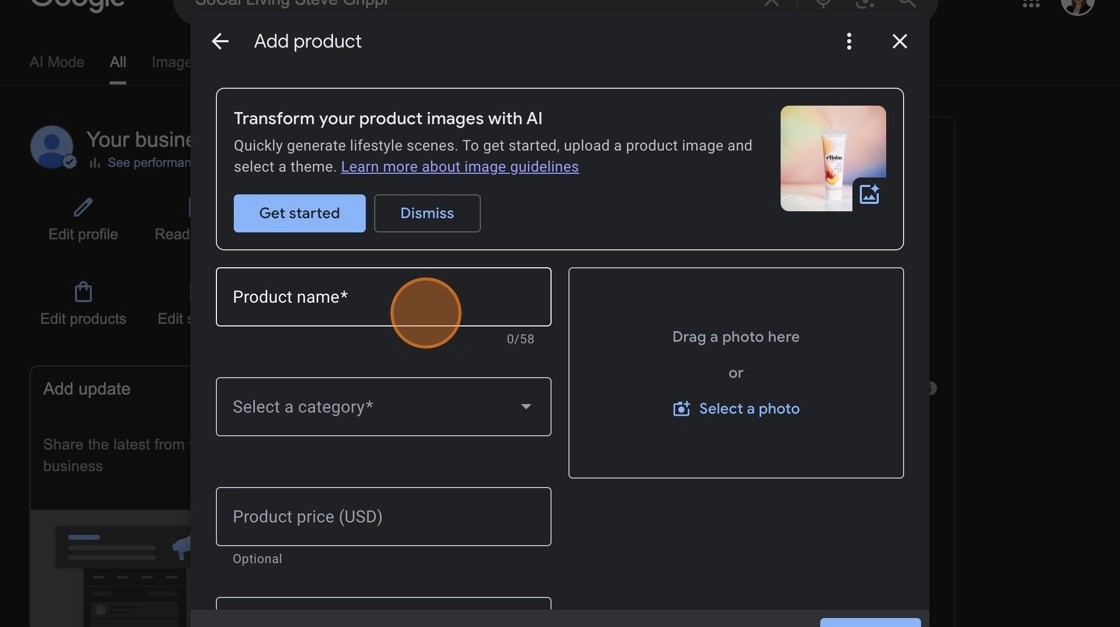
28. Click the “Select a category” dropdown. From the list, pick the category that best matches your product or service.
💡 Why it matters:
Categories help Google organize your listings so customers find them more easily.
The right category increases visibility in searches related to your product/service.
✅ Example:
If you’re listing “Stainless Steel Water Bottle”, choose Home & Kitchen → Drinkware.
If you’re listing “Residential Cleaning Service”, choose Home Services → Cleaning Service.
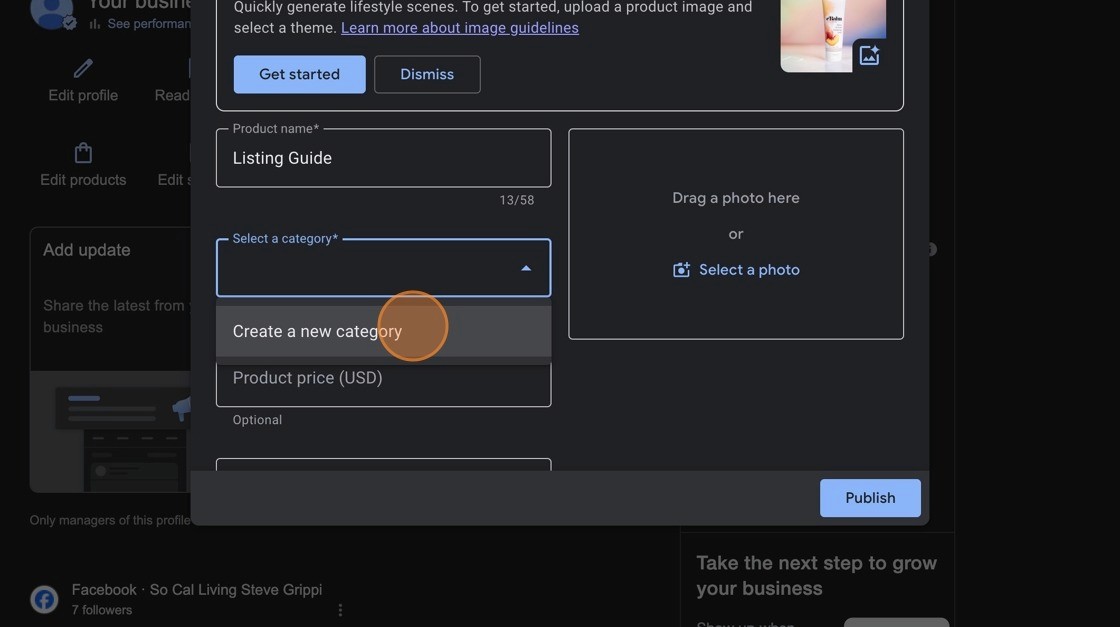
29. If you don’t already have categories set up or would like to add a new one, click on “Create a new category”.
Enter a relevant, general category that best represents your products.
Keep it broad enough so multiple products can fit under it, but still accurate to what you sell.
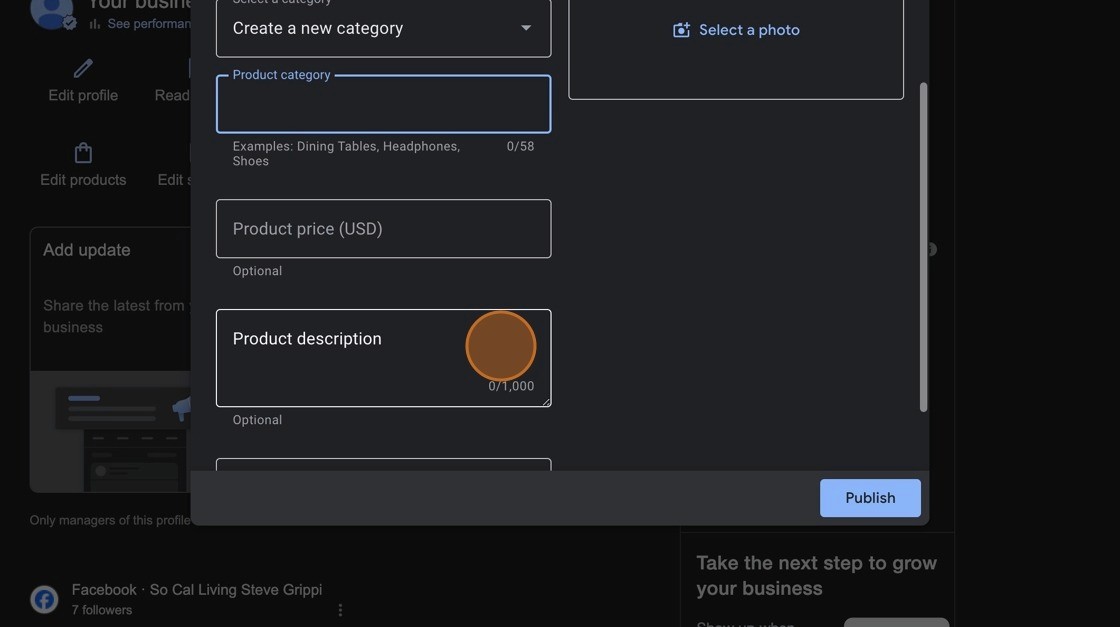
💡 Examples of general categories you could add:
Home Décor
Real Estate Services
Fitness Equipment
Beauty & Skincare
Outdoor Gear
Instead of only broad categories, you can also refine them to match your offerings more closely.
💡 For example:
Peptide
Injection
IV Therapy
NAD Therapy
These are much more specific and relevant, which helps customers quickly find what they’re looking for.
💡 Use industry-standard terms that your customers would recognize and search for.
👉 So instead of only “Health Products” or “Supplements,” you break it down into precise categories like “Peptide Therapy,” “Vitamin IV Drips,” or “Hormone Injections.”
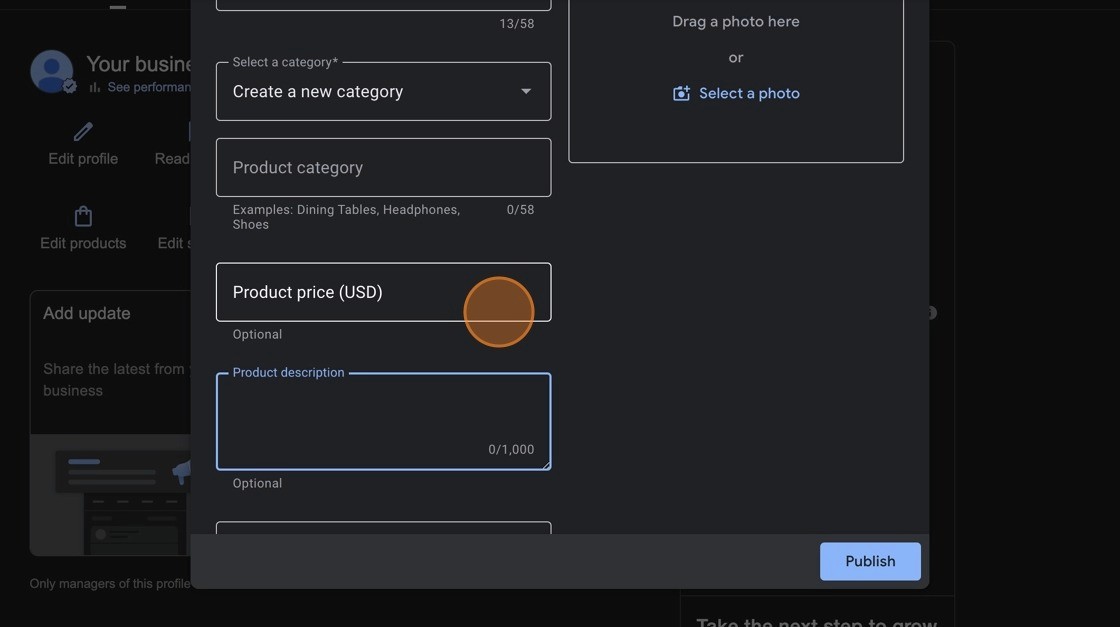
30. Click the "Product description"
🔑 Tips for writing strong product descriptions (up to 1,000 characters):
Start with the benefit → explain what problem it solves or how it helps the customer.
Example: “Boosts energy and supports faster recovery after workouts.”Include key features → highlight ingredients, dosage, or unique qualities.
Example: “Contains BPC-157 peptide, known for supporting tissue repair and reducing inflammation.”Keep it scannable → short sentences, easy to read.
Tip: Use bullet points if allowed.Add a call to action (CTA) → guide the customer on the next step.
Example: “Perfect for athletes and active individuals. Try it today!”
👉 This way, each description is clear, persuasive, and search-friendly.
31. The "Product price (USD)" field is optional.
32. The "Product landing page url" field is optional, but highly recommended because it gives customers a direct path to learn more or purchase.
Adding a link builds trust and can improve conversions, since people can see full details, reviews, or order directly.
✅ Best practices for the URL field:
Use a clean product page link → not a homepage if possible.
(Example:www.yoursite.com/products/bpc-157-injectioninstead of justwww.yoursite.com)Ensure the page is mobile-friendly → since many users browse from phones.
Match the product → the link should take them straight to that product, not a general catalog.
Track performance → use UTM tags if you want to measure traffic from your Google profile.
👉 Think of it like giving the customer a shortcut: they see the product, click, and they’re already on the page to buy or learn more.
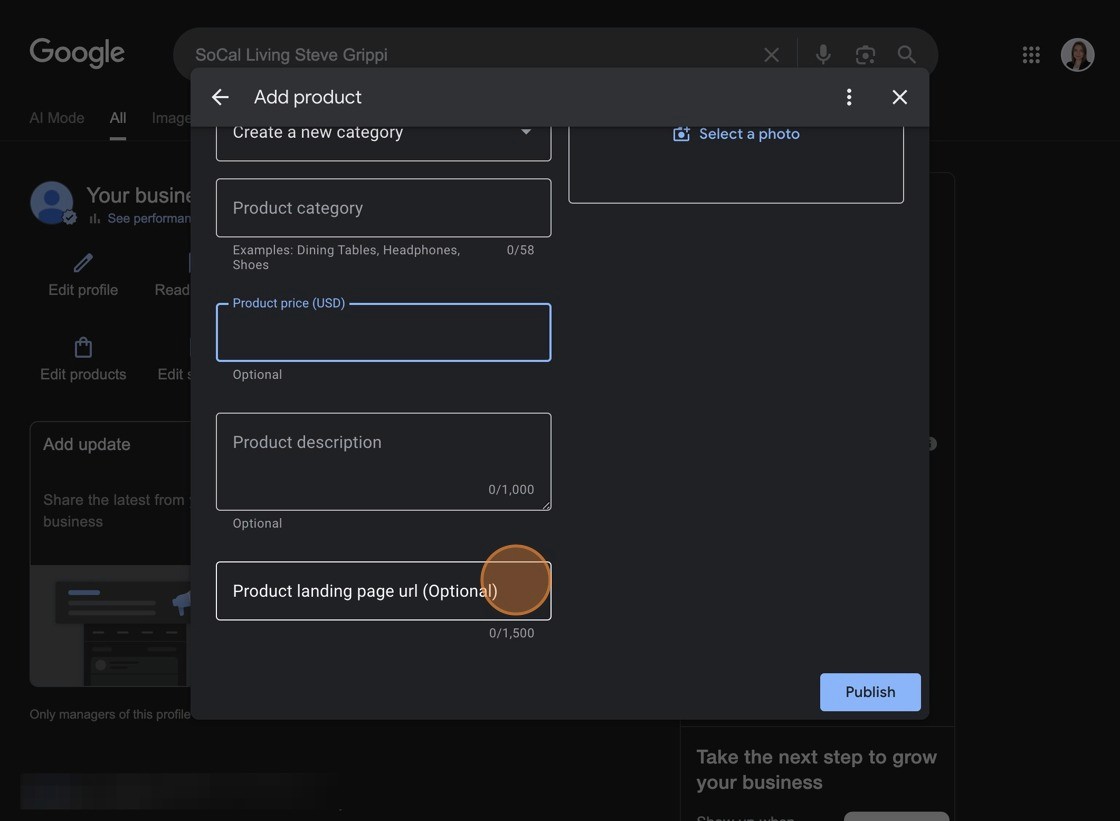
33. Add a product photo, click on the "Select a photo" (or drag an image into the box).
Choose a clear, high-quality image of your product.
Make sure the image matches Google’s product image guidelines:
Well-lit, in focus.
No heavy text overlays.
Only the product (avoid cluttered backgrounds unless lifestyle shots are useful).
Upload, and it will appear in the preview.
Best Practices for Product Photos
Use professional-looking shots → natural lighting works best.
Consistent style → use the same background or look across all your listings for branding.
Show variations if needed → multiple photos (different angles, packaging, or usage) make your product more appealing.
Square images (1:1 ratio) often display best across Google’s product listings.
👉 A strong product photo makes a huge difference — it’s often what makes someone click through.
34. Click "Publish" to Make the Product Live
35. After clicking the Edit services icon, you’ll see a section where you can enter a description of the services your business provides.
This should be a short overview that tells customers what you offer. Keep it broad and professional — for example:
"We provide a variety of health and wellness services designed to help clients improve energy, recovery, and overall well-being."
This description will appear on your Google Business profile, so make sure it reflects your main service categories without going into too much detail.
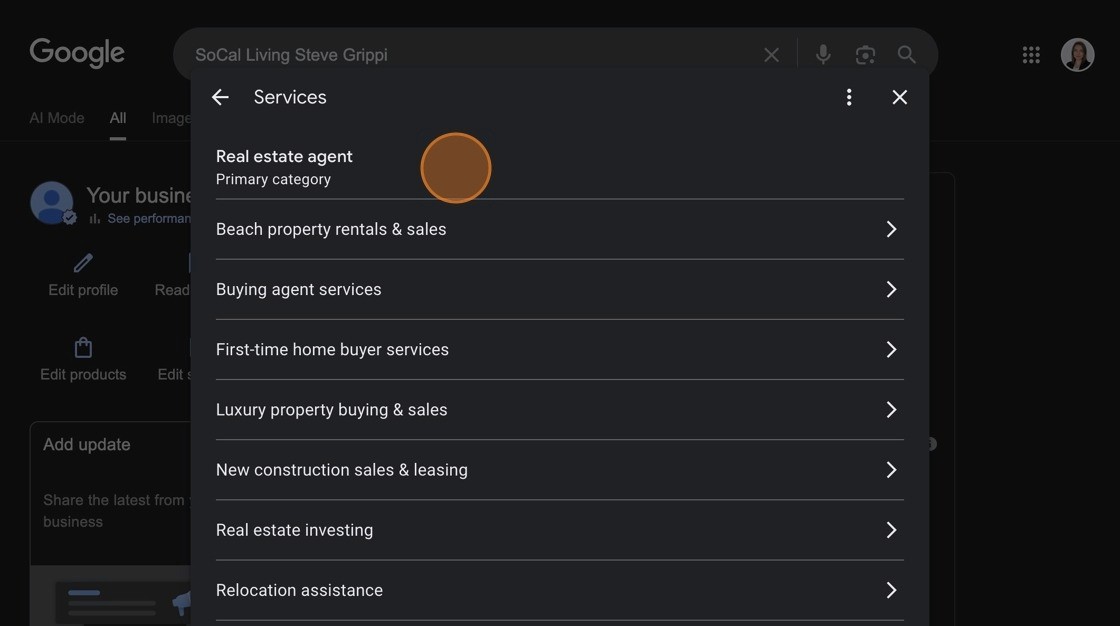
36. Select Primary Category of Your Service
Click on the Primary category field. This is the main category that best represents your business. Choosing the right primary category is important because it helps Google understand what your business does and ensures that you show up in the right search results.
For example, if you’re a real estate agent, you’ll want to select “Real estate agent” as your primary category. If your business fits better into another main category (like “Health clinic,” “Restaurant,” or “Marketing agency”), be sure to select the most relevant one.
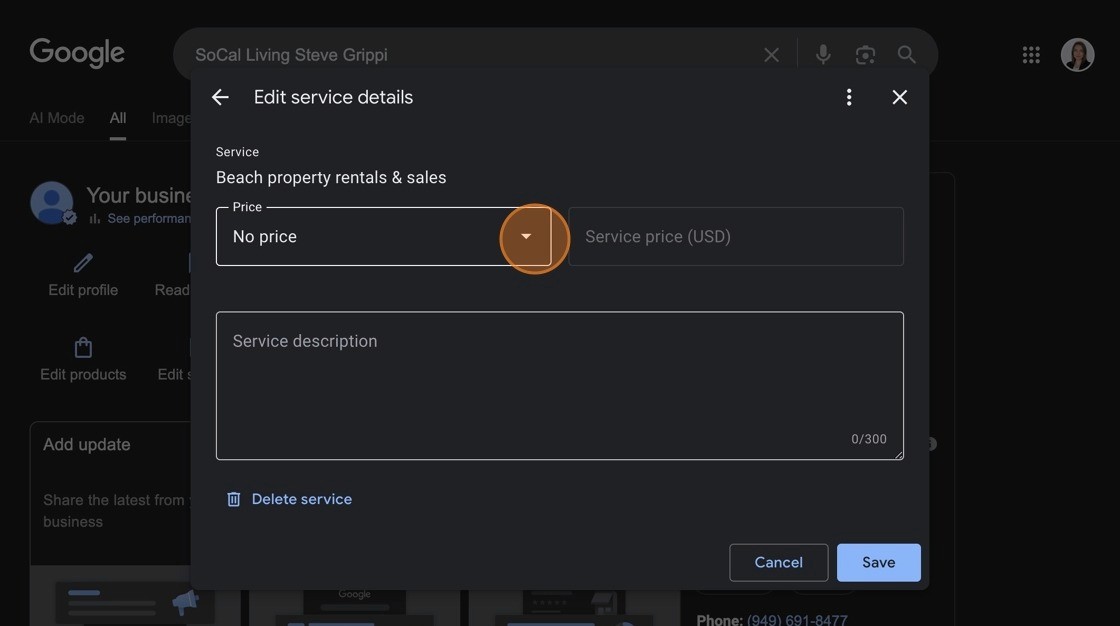
37. Edit your service details
Click the Price dropdown menu. Here, you can choose one of the following options:
No price – if you don’t want to display a price.
Free – if the service is complimentary.
Price range – if your service costs vary depending on details.
Fixed price – if your service has a set cost.
After selecting a price option, you can also enter a Service description (up to 300 characters). This is a great place to highlight what the service includes, key benefits, or any special features.
When finished, click Save to update the service.
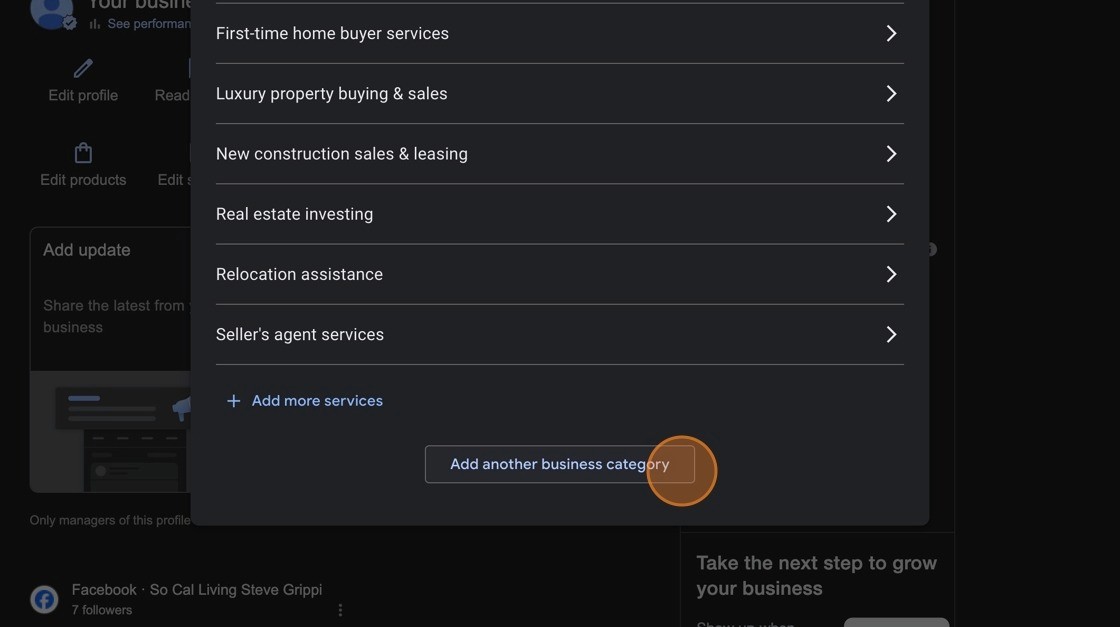
38. Add another business category
Click the “Add another business category” button. This allows you to include additional categories that represent your business services.
👉 For example, if your primary category is Real estate agent, you may also want to add categories like Property management company or Vacation home rental agency to cover the full range of your services.
Adding multiple categories helps your business appear in more relevant searches on Google.
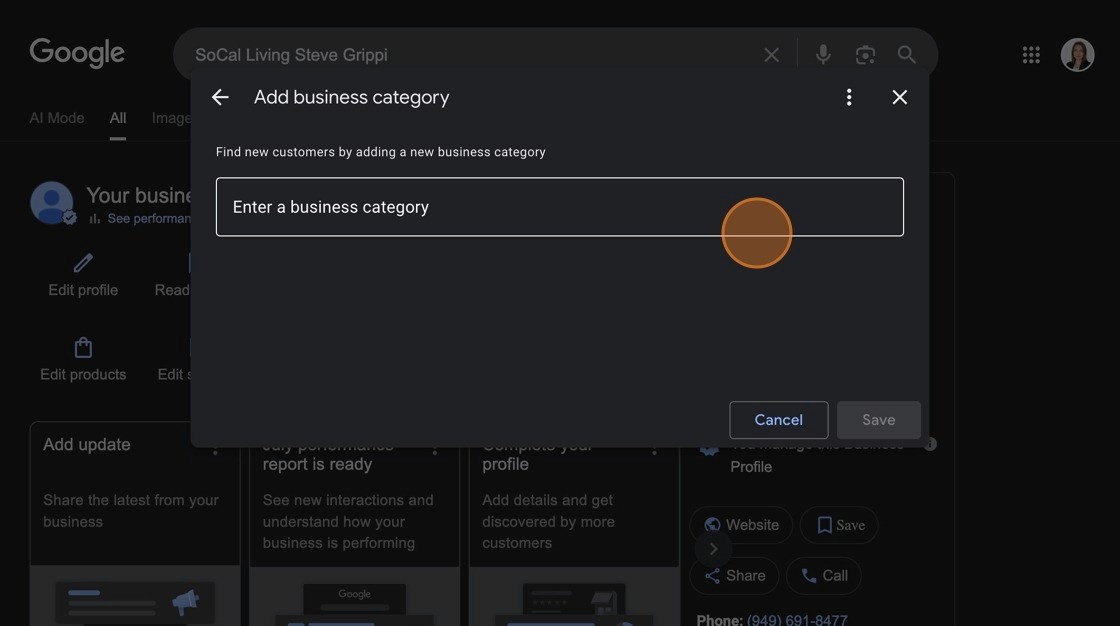
39. Click the "Enter a business category" field, enter your business category name and click Save.
40. The "Ask for reviews" option is another way to open the window with your unique review link.
You can copy this link and share it directly with clients, making it easier for them to leave a review for your business.
👉 Pro Tip: Sending your review link through email, text, or even on social media increases the chances of collecting more reviews quickly.
Tip: 👉 Need more help? Our team is here to help you.
Contact us anytime at info@sourcesem.com